Although InteractiveHtmlBom already supports generation of interactive BOMs from EasyEDA projects, but it involves messing with Python scripts and requires to host the generated html files somewhere. Since my knowledge of Python === null, and my favorite tool for designing electronics is EasyEDA – I decided to give it a shot and port it as a native extension.
Comparing to original solution, iBom for EasyEDA is available right within EasyEDA itself:
There is no need to run any Python scripts.
No need to host the produced html files.
iBom is always accessible by clicking a single menu button from your PCB document!
It also provides an ability to generate a stand-alone HTML representation the same way InteractiveHtmlBom does out of the box.
NOTE: This extension is still in ALPHA/BETA stage – a lot of things should be done in order to make it fully compatible with EasyEDA.
Go to Extension Settings dialog by using main menu Advanced -> Extensions -> Extensions Settings....
Click Load Extension... button and add all the files in from the extracted folder using Select Files... button.
Click Load Extension and close the Extension Settings dialog.
Usage
Within EasyEDA
In order to launch iBom within the editor itself – just click on iBom -> Launch... menu item:
You can always dismiss the iBom view by clicking on the little close button located in the right-top corner of the panel.
Generating stand-alone HTML representation
Just click iBom -> Generate & Download HTML menu item in order to get the stand-alone representation of your PCB document:
Note: In case the downloaded file doesn’t have .html extension – just add it manually. It is some sort of weird browser behaviour for the case to be investigated.
Feedback
If you discover any issue or have any suggestions for improvement of the plugin, please open an issue or find me on twitter @turbobabr.
A "hackable" nature of EasyEDA/LCEDA – thank you guys for allowing us messing with the product! 👏
svg-path-bbox for calculating various bounding boxes during EasyEDA -> InteractiveHTMLBOM data conversions.
License
MIT License
Copyright (c) 2021 Andrey Shakhmin
Permission is hereby granted, free of charge, to any person obtaining a copy
of this software and associated documentation files (the “Software”), to deal
in the Software without restriction, including without limitation the rights
to use, copy, modify, merge, publish, distribute, sublicense, and/or sell
copies of the Software, and to permit persons to whom the Software is
furnished to do so, subject to the following conditions:
The above copyright notice and this permission notice shall be included in all
copies or substantial portions of the Software.
THE SOFTWARE IS PROVIDED “AS IS”, WITHOUT WARRANTY OF ANY KIND, EXPRESS OR
IMPLIED, INCLUDING BUT NOT LIMITED TO THE WARRANTIES OF MERCHANTABILITY,
FITNESS FOR A PARTICULAR PURPOSE AND NONINFRINGEMENT. IN NO EVENT SHALL THE
AUTHORS OR COPYRIGHT HOLDERS BE LIABLE FOR ANY CLAIM, DAMAGES OR OTHER
LIABILITY, WHETHER IN AN ACTION OF CONTRACT, TORT OR OTHERWISE, ARISING FROM,
OUT OF OR IN CONNECTION WITH THE SOFTWARE OR THE USE OR OTHER DEALINGS IN THE
SOFTWARE.
The webpage is a result of XSLT transformation to both HTML applied on an XML file with football league data. It has been developed as a semestral work as a part of the course 4IZ238 XML – Theory and Practice of Markup Languages.
It’s the input XML file with a root element league and two its descendants detail describing the league detail and teams which lists the detailed description of the team itself and all its players. A brief form appears below:
XML input example
league>
<detail>
<!--/* League details */ -->
</detail>
<teams>
<team>
<description>
<!--/* Team description */ -->
</description>
<players>
<player>
<!--/* Player description */ -->
</player>
<!--/* Another player */ -->
</team>
<!--/* Another team */ -->
</teams>
</league>
Validation
The only input XML file validated against both an XSD file and a Schematron file.
This XSD file is a validation file for the input XML which validates its entire structure, the allowed count and order of the particular elements and the data type and format of their values. The following list provides a selection of the most important rules (not ordered by the importance):
All the names, shortcuts and contacts have to remain distinct
Each team is allowed to recruit at least 11 and up to 20 players and each player is between 15 and 99 years, both inclusive
Some of them are talented and their skill has to match the enumeration: free kicks, quick, powerful, technical or head
All the contacts, licenses and ID’s must match the format usually defined with a regular expression (Regex)
A player can play on one of 4 available positions: goalkeeper, defender, midfielder or forward
Their overall skill is represented by a double number between 1 and 40, both inclusive round on the halves using:
<xsd:assertiontest="$value = (for $d in 1 to 40 return 0.5 * $d)"/>
The Schematron validation is a minor and a supplementary validation file using XPath. Its only job is to assure that each team will have only and exactly one player market as a captain. A part of the overall score was the usage of a Schematron file and the captain validation is a job which suits Schematron a lot:
The crucial part of the semestral work is the transformation into HTML and PDF output with mutually linked pages and aggregation functions. Each transformation has defined a set of functions applicable to the statistics of the players.
The first transformation produces the website consisted of mutually linked HTML pages deployed on the project’s GitHub Pages with the similar design but variable linked content.
All the transformations are applied to the root element / and define immediately self as a template rendered to index.html with to generated partial templates under the div containers. The sample code is followed with a brief sample of the en:teams template responsible that each team have own page generated into chunks folder:
On the similar principle works the transformation to PDF with a watermark. In the beginning, there is generated a table of contents with links to particular pages. Each team is rendered to the separated page. Last few pages have generated tables with the best players.
This transformation is three times more verbose than the previous one because of the design redefinition since CSS can not be used to this kind of transformation. However, unlike the used elemenets, the principle is pretty identical. A really shortened example of a block summary of the best goalkeepers follows:
The best goalkeepers template (49 lines)
xsl:templatename="bestPlayers">
<fo:blockid="bestPlayers"break-before="page"></fo:block>
<xsl:call-templatename="watermark"/>
<fo:blockfont-size="9mm"text-align="center"padding-top="5mm">
<xsl:text>Best players</xsl:text>
</fo:block>
<!-- /* Block for the best goalkeepers */-->
<fo:blockpadding-before="1cm"width="75%">
<fo:blockmargin-left="2cm">
<fo:blockfont-size="6mm"padding-after="5mm">
<xsl:text>Best goalkeepers</xsl:text>
</fo:block>
<fo:tabletext-align="center"white-space="nowrap"width="75%"font-size="3mm">
<fo:table-columnwidth="20%"/>
<!-- /* SKIPPED: 4 identical lines */-->
<fo:table-columnwidth="20%"/>
<!-- /* Table header definition */-->
<fo:table-header>
<fo:table-rowfont-size="3mm"height="8mm">
<fo:table-cell><fo:block>NAME</fo:block></fo:table-cell>
<!-- /* SKIPPED: Age, Nationality and Skill */-->
<fo:table-cell><fo:block>TEAM</fo:block></fo:table-cell>
<fo:table-cell><fo:block></fo:block></fo:table-cell>
</fo:table-row>
</fo:table-header>
<!-- /* Table body definition */-->
<fo:table-bodypadding-top="5mm">
<xsl:for-eachselect=
"en:league/en:teams/en:team/en:players/en:player[@position='goalkeeper']">
<xsl:sortselect="en:skill"data-type="number"order="descending"/>
<xsl:iftest="position() <= 6">
<!-- /* Call of the template rendering the player characteristics */-->
<xsl:call-templatename="six-characteristics">
<xsl:with-paramname="node"select="."/>
</xsl:call-template>
</xsl:if>
</xsl:for-each>
</fo:table-body>
</fo:table>
</fo:block>
</fo:block>
<!-- /* SKIPPED: 3 blocks for the defenders, midfielders and forwards */-->
</fo:block>
</xsl:template>
Ouptut
This section offers an overall view to the generated content structure.
The GitHub PDF viewer doesn’t suppor the links to the pages. There is need to download the file for the full functionality.
Quality check
I have integrated Codebeat and Codacy cloud static analysis services to check the overall code quality out of curiosity.
Licence
MIT License
Copyright (c) 2018 Nikolas Charalambidis
Permission is hereby granted, free of charge, to any person obtaining a copy
of this software and associated documentation files (the “Software”), to deal
in the Software without restriction, including without limitation the rights
to use, copy, modify, merge, publish, distribute, sublicense, and/or sell
copies of the Software, and to permit persons to whom the Software is
furnished to do so, subject to the following conditions:
The above copyright notice and this permission notice shall be included in all
copies or substantial portions of the Software.
THE SOFTWARE IS PROVIDED “AS IS”, WITHOUT WARRANTY OF ANY KIND, EXPRESS OR
IMPLIED, INCLUDING BUT NOT LIMITED TO THE WARRANTIES OF MERCHANTABILITY,
FITNESS FOR A PARTICULAR PURPOSE AND NONINFRINGEMENT. IN NO EVENT SHALL THE
AUTHORS OR COPYRIGHT HOLDERS BE LIABLE FOR ANY CLAIM, DAMAGES OR OTHER
LIABILITY, WHETHER IN AN ACTION OF CONTRACT, TORT OR OTHERWISE, ARISING FROM,
OUT OF OR IN CONNECTION WITH THE SOFTWARE OR THE USE OR OTHER DEALINGS IN THE
SOFTWARE.
Kong API Gateway plugin for url-rewrite purposes. This plugin has been tested to work along with kong >= 2.6.x, for a legacy version of this plugin, please check this link.
The Problem
When using Kong, you can create routes that proxy to an upstream. The problem lies when the upstream has an url that is not very friendly to your clients, or restful, or even pretty. When you add a Route in Kong, you have a somewhat limited url rewrite capability. This plugin simply throws away the url set in Kong route and uses the url set in it’s configuration to proxy to the upstream. This gives you full freedom as to how to write your url’s in Kong and inner services as well.
Project Structure
The plugin folder should contain at least a schema.lua and a handler.lua, alongside with a spec folder and a .rockspec file specifying the current version of the package.
useOnStartTyping – Fires a callback when the user starts typing outside editable fields (input, textarea, contenteditable). Supports filtering for a-z and 0-9 keys.
useOnWindowResize – A React hook for adding an event listener for window resize
useOnWindowScroll – A React hook for adding an event listener for window scroll
useOutsideClick – Outside click(for a ref) event as hook for React.
useOutsideClickRef – A hook that can track a click event outside a ref. Returns a callbackRef.
useBoundingclientrectRef – A hook that tracks the boundingclientrect of an element. It returns a callbackRef so that the element node if changed is easily tracked.
useDimensionsRef – Easily grab dimensions of an element with a ref using this hook
useFullscreen – Use full screen api for making beautiful and emersive experinces.
⚠️ Experimental hooks may be removed or significantly changed in any release without notice. Use with caution in production.
Features
✅ Collection of 99 hooks as standalone modules.
✅ Standalone package with all the hooks at one place
✅ Built for ESM
Installation
npm i -s rooks
Import any hook from “rooks” and start using them!
import{useDidMount}from"rooks";
Usage
functionApp(){useDidMount(()=>{alert("mounted");});return(<divclassName="App"><h1>Hello CodeSandbox</h1><h2>Start editing to see some magic happen!</h2></div>);}
Standalone Package
Package containing all the hooks is over here. – Docs and Npm Install
License
MIT
Contributors ✨
Thanks goes to these wonderful people (emoji key):
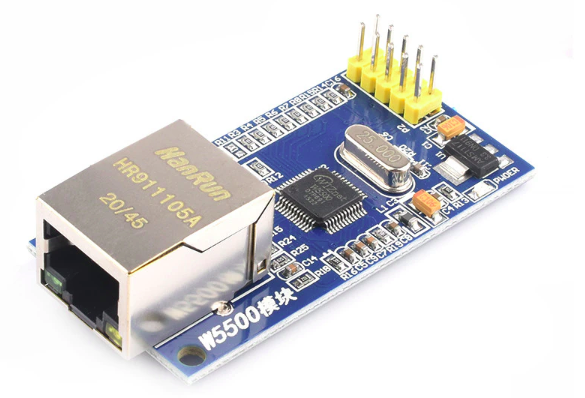
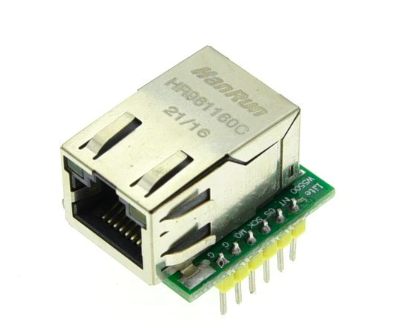
This is an ESP8266 + LwIP W5500 Credentials and Connection Manager with fallback Web ConfigPortal. This Library is used for configuring ESP8266 Ethernet Static / DHCP and Credentials at runtime. You can specify static DNS servers, personalized HostName and CORS feature.
This library is based on, modified and improved from:
ESP_DoubleResetDetector v1.3.2+ if using DRD feature. To install, check . Use v1.1.0+ if using LittleFS for ESP8266 v1.0.6+.
Installation
Use Arduino Library Manager
The best and easiest way is to use Arduino Library Manager. Search for ESP8266_W5500_Manager, then select / install the latest version. You can also use this link for more detailed instructions.
Use included platformio.ini file from examples to ensure that all dependent libraries will installed automatically. Please visit documentation for the other options and examples at Project Configuration File
HOWTO Fix Multiple Definitions Linker Error
The current library implementation, using xyz-Impl.h instead of standard xyz.cpp, possibly creates certain Multiple Definitions Linker error in certain use cases.
in many files. But be sure to use the following #include <ESP8266_W5500_Manager.h>in just 1 .h, .cpp or .ino file, which must not be included in any other file, to avoid Multiple Definitions Linker Error
// To be included only in main(), .ino with setup() to avoid `Multiple Definitions` Linker Error
#include<ESP8266_W5500_Manager.h>//https://github.com/khoih-prog/ESP8266_W5500_Manager
The ConfigOnSwitch example shows how it works and should be used as the basis for a sketch that uses this library.
The concept of ConfigOnSwitch is that a new ESP8266 will start a ConfigPortal when powered up and save the configuration data in non volatile memory. Thereafter, the ConfigPortal will only be started again if a button is pushed on the ESP8266 module.
Using any network-enabled device with a browser (computer, phone, tablet) connect to the newly created Access Point (AP) (Dynamic or Static IP specified in sketch)
then connect WebBrowser to configurable ConfigPortal IP address, e.g. 192.168.186
HOWTO Basic configurations
1. Using default for every configurable parameter
Include in your sketch
#include<FS.h>
#include<ESP8266WiFi.h>//https://github.com/esp8266/Arduino//needed for library
#include<DNSServer.h>
#defineUSE_LITTLEFStrue
#if USE_LITTLEFS
#include<LittleFS.h>
FS* filesystem = &LittleFS;
#defineFileFS LittleFS
#defineFS_Name"LittleFS"
#else
FS* filesystem = &SPIFFS;
#defineFileFS SPIFFS
#defineFS_Name"SPIFFS"
#endif//////////////////////////////////////////////////////////
#defineESP_getChipId() (ESP.getChipId())
#defineLED_ON LOW
#defineLED_OFF HIGH
//////////////////////////////////////////////////////////// You only need to format the filesystem once//#define FORMAT_FILESYSTEM true
#defineFORMAT_FILESYSTEMfalse////////////////////////////////////////////////////
#include<ESP8266_W5500_Manager.h>//https://github.com/khoih-prog/ESP8266_W5500_Manager
#defineHTTP_PORT80
2. Using many configurable parameters
Include in your sketch
#include<FS.h>
#include<ESP8266WiFi.h>//https://github.com/esp8266/Arduino//needed for library
#include<DNSServer.h>
#defineUSE_LITTLEFStrue
#if USE_LITTLEFS
#include<LittleFS.h>
FS* filesystem = &LittleFS;
#defineFileFS LittleFS
#defineFS_Name"LittleFS"
#else
FS* filesystem = &SPIFFS;
#defineFileFS SPIFFS
#defineFS_Name"SPIFFS"
#endif//////////////////////////////////////////////////////////
#defineESP_getChipId() (ESP.getChipId())
#defineLED_ON LOW
#defineLED_OFF HIGH
//////////////////////////////////////////////////////////////// You only need to format the filesystem once//#define FORMAT_FILESYSTEM true
#defineFORMAT_FILESYSTEMfalse//////////////////////////////////////////////////////////////// Assuming max 49 chars
#defineTZNAME_MAX_LEN50
#defineTIMEZONE_MAX_LEN50typedefstruct
{
char TZ_Name[TZNAME_MAX_LEN]; // "America/Toronto"char TZ[TIMEZONE_MAX_LEN]; // "EST5EDT,M3.2.0,M11.1.0"uint16_t checksum;
} EthConfig;
EthConfig Ethconfig;
//////////////////////////////////////////////////////////////
#defineCONFIG_FILENAMEF("/eth_cred.dat")
//////////////////////////////////////////////////////////////// Indicates whether ESP has credentials saved from previous session, or double reset detected
bool initialConfig = false;
// Use false if you don't like to display Available Pages in Information Page of Config Portal// Comment out or use true to display Available Pages in Information Page of Config Portal// Must be placed before #include <ESP8266_W5500_Manager.h>
#defineUSE_AVAILABLE_PAGEStrue// From v1.0.10 to permit disable/enable StaticIP configuration in Config Portal from sketch. Valid only if DHCP is used.// You'll loose the feature of dynamically changing from DHCP to static IP, or vice versa// You have to explicitly specify false to disable the feature.//#define USE_STATIC_IP_CONFIG_IN_CP false// Use false to disable NTP config. Advisable when using Cellphone, Tablet to access Config Portal.// See Issue 23: On Android phone ConfigPortal is unresponsive (https://github.com/khoih-prog/ESP_WiFiManager/issues/23)
#defineUSE_ESP_ETH_MANAGER_NTPtrue// Just use enough to save memory. On ESP8266, can cause blank ConfigPortal screen// if using too much memory
#defineUSING_AFRICAfalse
#defineUSING_AMERICAtrue
#defineUSING_ANTARCTICAfalse
#defineUSING_ASIAfalse
#defineUSING_ATLANTICfalse
#defineUSING_AUSTRALIAfalse
#defineUSING_EUROPEfalse
#defineUSING_INDIANfalse
#defineUSING_PACIFICfalse
#defineUSING_ETC_GMTfalse// Use true to enable CloudFlare NTP service. System can hang if you don't have Internet access while accessing CloudFlare// See Issue #21: CloudFlare link in the default portal (https://github.com/khoih-prog/ESP_WiFiManager/issues/21)
#defineUSE_CLOUDFLARE_NTPfalse// New in v1.0.11
#defineUSING_CORS_FEATUREtrue//////////////////////////////////////////////////////////////// Use USE_DHCP_IP == true for dynamic DHCP IP, false to use static IP which you have to change accordingly to your network
#if (defined(USE_STATIC_IP_CONFIG_IN_CP) && !USE_STATIC_IP_CONFIG_IN_CP)
// Force DHCP to be true
#if defined(USE_DHCP_IP)
#undef USE_DHCP_IP
#endif
#defineUSE_DHCP_IPtrue
#else// You can select DHCP or Static IP here//#define USE_DHCP_IP true
#defineUSE_DHCP_IPfalse
#endif
#if ( USE_DHCP_IP )
// Use DHCP
#if (_ESP8266_ETH_MGR_LOGLEVEL_ > 3)
#warning Using DHCP IP
#endif
IPAddress stationIP = IPAddress(0, 0, 0, 0);
IPAddress gatewayIP = IPAddress(192, 168, 2, 1);
IPAddress netMask = IPAddress(255, 255, 255, 0);
#else// Use static IP
#if (_ESP8266_ETH_MGR_LOGLEVEL_ > 3)
#warning Using static IP
#endif
IPAddress stationIP = IPAddress(192, 168, 2, 186);
IPAddress gatewayIP = IPAddress(192, 168, 2, 1);
IPAddress netMask = IPAddress(255, 255, 255, 0);
#endif//////////////////////////////////////////////////////////////
#defineUSE_CONFIGURABLE_DNStrue
IPAddress dns1IP = gatewayIP;
IPAddress dns2IP = IPAddress(8, 8, 8, 8);
#include<ESP8266_W5500_Manager.h>//https://github.com/khoih-prog/ESP8266_W5500_Manager
#defineHTTP_PORT80///////////////////////////////////////////////////////////////****************************************** // Defined in ESP8266_W5500_Manager.hpp typedef struct { IPAddress _sta_static_ip; IPAddress _sta_static_gw; IPAddress _sta_static_sn; #if USE_CONFIGURABLE_DNS IPAddress _sta_static_dns1; IPAddress _sta_static_dns2; #endif } ETH_STA_IPConfig;******************************************/
ETH_STA_IPConfig EthSTA_IPconfig;
3. Using STA-mode DHCP, but don’t like to change to static IP or display in Config Portal
// You'll loose the feature of dynamically changing from DHCP to static IP, or vice versa// You have to explicitly specify false to disable the feature.
#defineUSE_STATIC_IP_CONFIG_IN_CPfalse
4. Using STA-mode DHCP, but permit to change to static IP and display in Config Portal
// You'll loose the feature of dynamically changing from DHCP to static IP, or vice versa// You have to explicitly specify false to disable the feature.//#define USE_STATIC_IP_CONFIG_IN_CP false// Use USE_DHCP_IP == true for dynamic DHCP IP, false to use static IP which you have to change accordingly to your network
#if (defined(USE_STATIC_IP_CONFIG_IN_CP) && !USE_STATIC_IP_CONFIG_IN_CP)
// Force DHCP to be true
#if defined(USE_DHCP_IP)
#undef USE_DHCP_IP
#endif
#defineUSE_DHCP_IPtrue
#else// You can select DHCP or Static IP here
#defineUSE_DHCP_IPtrue
#endif
5. Using STA-mode StaticIP, and be able to change to DHCP IP and display in Config Portal
// You'll loose the feature of dynamically changing from DHCP to static IP, or vice versa// You have to explicitly specify false to disable the feature.//#define USE_STATIC_IP_CONFIG_IN_CP false// Use USE_DHCP_IP == true for dynamic DHCP IP, false to use static IP which you have to change accordingly to your network
#if (defined(USE_STATIC_IP_CONFIG_IN_CP) && !USE_STATIC_IP_CONFIG_IN_CP)
// Force DHCP to be true
#if defined(USE_DHCP_IP)
#undef USE_DHCP_IP
#endif
#defineUSE_DHCP_IPtrue
#else// You can select DHCP or Static IP here
#defineUSE_DHCP_IPfalse
#endif
6. Using STA-mode StaticIP and configurable DNS, and be able to change to DHCP IP and display in Config Portal
// You'll loose the feature of dynamically changing from DHCP to static IP, or vice versa// You have to explicitly specify false to disable the feature.//#define USE_STATIC_IP_CONFIG_IN_CP false// Use USE_DHCP_IP == true for dynamic DHCP IP, false to use static IP which you have to change accordingly to your network
#if (defined(USE_STATIC_IP_CONFIG_IN_CP) && !USE_STATIC_IP_CONFIG_IN_CP)
// Force DHCP to be true
#if defined(USE_DHCP_IP)
#undef USE_DHCP_IP
#endif
#defineUSE_DHCP_IPtrue
#else// You can select DHCP or Static IP here
#defineUSE_DHCP_IPfalse
#endif
#defineUSE_CONFIGURABLE_DNStrue
IPAddress dns1IP = gatewayIP;
IPAddress dns2IP = IPAddress(8, 8, 8, 8);
7. Using STA-mode StaticIP and auto DNS, and be able to change to DHCP IP and display in Config Portal
// You'll loose the feature of dynamically changing from DHCP to static IP, or vice versa// You have to explicitly specify false to disable the feature.//#define USE_STATIC_IP_CONFIG_IN_CP false// Use USE_DHCP_IP == true for dynamic DHCP IP, false to use static IP which you have to change accordingly to your network
#if (defined(USE_STATIC_IP_CONFIG_IN_CP) && !USE_STATIC_IP_CONFIG_IN_CP)
// Force DHCP to be true
#if defined(USE_DHCP_IP)
#undef USE_DHCP_IP
#endif
#defineUSE_DHCP_IPtrue
#else// You can select DHCP or Static IP here
#defineUSE_DHCP_IPfalse
#endif
#defineUSE_CONFIGURABLE_DNSfalse
8. Not using NTP to avoid issue with some WebBrowsers, especially in CellPhone or Tablets.
// Use false to disable NTP config. Advisable when using Cellphone, Tablet to access Config Portal.// See Issue 23: On Android phone ConfigPortal is unresponsive (https://github.com/khoih-prog/ESP_WiFiManager/issues/23)
#defineUSE_ESP_ETH_MANAGER_NTPfalse
9. Using NTP feature with CloudFlare. System can hang until you have Internet access for CloudFlare.
// Use false to disable NTP config. Advisable when using Cellphone, Tablet to access Config Portal.// See Issue 23: On Android phone ConfigPortal is unresponsive (https://github.com/khoih-prog/ESP_WiFiManager/issues/23)
#defineUSE_ESP_ETH_MANAGER_NTPtrue// Use true to enable CloudFlare NTP service. System can hang if you don't have Internet access while accessing CloudFlare// See Issue #21: CloudFlare link in the default portal (https://github.com/khoih-prog/ESP_WiFiManager/issues/21)
#defineUSE_CLOUDFLARE_NTPtrue
10. Using NTP feature without CloudFlare to avoid system hang if no Internet access for CloudFlare.
// Use false to disable NTP config. Advisable when using Cellphone, Tablet to access Config Portal.// See Issue 23: On Android phone ConfigPortal is unresponsive (https://github.com/khoih-prog/ESP_WiFiManager/issues/23)
#defineUSE_ESP_ETH_MANAGER_NTPtrue// Use true to enable CloudFlare NTP service. System can hang if you don't have Internet access while accessing CloudFlare// See Issue #21: CloudFlare link in the default portal (https://github.com/khoih-prog/ESP_WiFiManager/issues/21)
#defineUSE_CLOUDFLARE_NTPfalse
12. Using CORS (Cross-Origin Resource Sharing) feature
To use CORS feature with default CORS Header ““. Some WebBrowsers won’t accept this allowing-all “” CORS Header.
// Default false for using only whenever necessary to avoid security issue
#defineUSING_CORS_FEATUREtrue
To use CORS feature with specific CORS Header “Your Access-Control-Allow-Origin”. To be modified according to your specific Allowed-Origin.
// Default false for using only whenever necessary to avoid security issue
#defineUSING_CORS_FEATUREtrue
...
#if USING_CORS_FEATURE
ESP_wifiManager.setCORSHeader("Your Access-Control-Allow-Origin");
#endif
Not use CORS feature (default)
// Default false for using only whenever necessary to avoid security issue
#defineUSING_CORS_FEATUREfalse
13. How to auto getting _timezoneName
Turn on auto NTP configuration by
// Use false to disable NTP config. Advisable when using Cellphone, Tablet to access Config Portal.// See Issue 23: On Android phone ConfigPortal is unresponsive (https://github.com/khoih-prog/ESP_WiFiManager/issues/23)
#defineUSE_ESP_ETH_MANAGER_NTPtrue
The _timezoneName, in the format similar to America/New_York, America/Toronto, Europe/London, etc., can be retrieved by using
ESP8266 TZ can be configured, using the similar to EST5EDT,M3.2.0,M11.1.0 (for America/New_York) , as follows:
// EST5EDT,M3.2.0,M11.1.0 (for America/New_York)// EST5EDT is the name of the time zone// EST is the abbreviation used when DST is off// 6 hours is the time difference from GMT// EDT is the abbreviation used when DST is on// ,M3 is the third month// .2 is the second occurrence of the day in the month// .0 is Sunday// ,M11 is the eleventh month// .1 is the first occurrence of the day in the month// .0 is SundayconfigTime(Ethconfig.TZ, "pool.ntp.org");
To convert from _timezoneName to TZ, use the function getTZ() as follows:
The conversion depends on the stored TZs, which is using some memory, and can cause issue for ESP8266 in certain cases. Therefore, enable just the region you’re interested.
For example, your application is used in America continent, you need just
#defineUSING_AMERICAtrue
Hereafter is the regions’ list
// Just use enough to save memory. On ESP8266, can cause blank ConfigPortal screen// if using too much memory
#defineUSING_AFRICAfalse
#defineUSING_AMERICAtrue
#defineUSING_ANTARCTICAfalse
#defineUSING_ASIAfalse
#defineUSING_ATLANTICfalse
#defineUSING_AUSTRALIAfalse
#defineUSING_EUROPEfalse
#defineUSING_INDIANfalse
#defineUSING_PACIFICfalse
#defineUSING_ETC_GMTfalse
15. How to use the TZ variable to configure Timezone
configTime(Ethconfig.TZ, "pool.ntp.org");
then to print local time
voidprintLocalTime()
{
statictime_t now;
now = time(nullptr);
if ( now > 1451602800 )
{
Serial.print("Local Date/Time: ");
Serial.print(ctime(&now));
}
}
HOWTO Open Config Portal
When you want to open a config portal, with default DHCP hostname ESP8266-XXXXXX, just add
While in Config Portal, connect to it using its AP IP, e.g. 192.168.2.186, configure Credentials, then save. The settings will be saved in non volatile memory. It will then reboot and autoconnect.
HOWTO Add Dynamic Parameters
These illustrating steps is based on the example ConfigOnSwitchFS
1. Determine the variables to be configured via Config Portal (CP)
The application will:
use DHT sensor (either DHT11 or DHT22) and
need to connect to ThingSpeak with unique user’s API Key.
The DHT sensor is connected to the ESP boards using SDA/SCL pins which also need to be configurable.
So this is the list of variables to be dynamically configured using CP
1. `thingspeakApiKey`,  type `char array`, max length 17 chars, and just arbitrarily selected default value to be "" or "ThingSpeak-APIKey"
2. `sensorDht22`,       type `bool`, default to be `true` (DHT22)
3. `pinSda`,            type `int`,  default to be `PIN_D2`
4. `pinScl`,            type `int`,  default to be `PIN_D1`
The Label can be any arbitrary string that help you identify the variable, but must be unique in your application
The initial code will be
#defineAPI_KEY_LEN17// Default configuration valueschar thingspeakApiKey[API_KEY_LEN] = "";
bool sensorDht22 = true;
int pinSda = PIN_D2; // Pin D2 mapped to pin GPIO4 of ESP8266int pinScl = PIN_D1; // Pin D1 mapped to pin GPIO5 of ESP8266// Any unique string helping you identify the vars
#defineThingSpeakAPI_Label"thingspeakApiKey"
#defineSensorDht22_Label"SensorDHT22"
#definePinSDA_Label"PinSda"
#definePinSCL_Label"PinScl"
2. Initialize the variables to prepare for Config Portal (CP)
The example ConfigOnSwitchFS will open the CP whenever a SW press is detected in loop(). So the code to add dynamic variables will be there, just after the CP ESP8266_W5500_Manager class initialization to create ESP8266_W5500_Manager object.
voidloop()
{
// is configuration portal requested?if ((digitalRead(TRIGGER_PIN) == LOW) || (digitalRead(TRIGGER_PIN2) == LOW))
{
Serial.println("\nConfiguration portal requested.");
digitalWrite(LED_BUILTIN, LED_ON); // turn the LED on by making the voltage LOW to tell us we are in configuration mode.//Local initialization. Once its business is done, there is no need to keep it around
ESP8266_W5500_Manager ESP8266_W5500_manager("ConfigOnSwitchFS");
//Check if there is stored WiFi router/password credentials.//If not found, device will remain in configuration mode until switched off via webserver.
Serial.print("Opening configuration portal. ");
...
// The addition of dynamic vars will be somewhere here
}
The ESP8266_EMParameter class constructor will be used to initialize each newly-added parameter object.
2.1 Use the following simple constructor for simple variables such as thingspeakApiKey, pinSda and pinScl :
ESP8266_EMParameter(constchar *id, constchar *placeholder, constchar *defaultValue, int length);
2.2 For example, to create a new ESP8266_EMParameter object p_thingspeakApiKey for thingspeakApiKey,
The command to use will be
ESP8266_EMParameter p_thingspeakApiKey(ThingSpeakAPI_Label, "Thingspeak API Key", thingspeakApiKey, API_KEY_LEN);
where
- p_thingspeakApiKey                  : ESP8266_EMParameter class object reference that stores the new Custom Parameter
- id => ThingSpeakAPI_Label           : var ref to Json associative name and HTML element ID for the new Custom Paramerter you just defined in step 1
- placeholder => "Thingspeak API Key" : HTML input placeholder and/or label element text the user sees in the configuration interface for this Custom Parameter
- defaultValue => thingspeakApiKey    : variable for storing the value of your Custom Parameter in the file system or default value when no data is entered
- length  => API_KEY_LEN              : max allowed length you want for this Custom Parameter to have
For pinSda and pinScl, the command will be similar
// I2C SCL and SDA parameters are integers so we need to convert them to char array but// no other special considerationschar convertedValue[3];
sprintf(convertedValue, "%d", pinSda);
ESP8266_EMParameter p_pinSda(PinSDA_Label, "I2C SDA pin", convertedValue, 3);
sprintf(convertedValue, "%d", pinScl);
ESP8266_EMParameter p_pinScl(PinSCL_Label, "I2C SCL pin", convertedValue, 3);
where
- p_pinSda / p_pinScl                         : ESP8266_EMParameter class object reference that stores the new Custom Parameter
- id => PinSDA_Label/PinSCL_Label             : var ref to Json associative name and HTML element ID for the new Custom Paramerter you just defined in step 1
- placeholder => "I2C SDA pin"https://github.com/"I2C SCL pin"  : HTML input placeholder and/or label element text the user sees in the configuration interface for this Custom Parameter
- defaultValue => convertedValue              : variable for storing the value of your Custom Parameter in the file system or default value when no data is entered
- length  => 3                                : max allowed length you want for this Custom Parameter to have
2.3 Use the more complex following constructor for variables such as sensorDht22:
ESP8266_EMParameter(constchar *id, constchar *placeholder, constchar *defaultValue, int length, constchar *custom, int labelPlacement);
2.4 For example, to create a new ESP8266_EMParameter object p_sensorDht22 for sensorDht22,
- p_sensorDht22                       : ESP8266_EMParameter class object reference that stores the new Custom Parameter
- id => SensorDht22_Label             : var ref to Json associative name and HTML element ID for the new Custom Paramerter you just defined in step 1
- placeholder => "DHT-22 Sensor"      : HTML input placeholder and/or label element text the user sees in the configuration interface for this Custom Parameter
- defaultValue => "T"                 : variable for storing the value of your Custom Parameter in the file system or default value when no data is entered ("T" means `true`)
- length  => 2                        : max allowed length you want for this Custom Parameter to have
- custom => customhtml                : custom HTML code to add element type, e.g. `checkbox`, and `checked` when `sensorDht22 == true`
- labelPlacement => WFM_LABEL_AFTER   : to place label after
Adding those ESP8266_EMParameter objects created in Step 2 using the function addParameter() of object ESP8266_W5500_Manager
3.1 addParameter() function Prototype:
//adds a custom parameterbooladdParameter(ESP8266_EMParameter *p);
3.2 Code to add variables to CP
Add parameter objects, previously created in Step 2, such as : p_thingspeakApiKey, p_sensorDht22, p_pinSda and p_pinScl
//add all parameters here

ESP8266_W5500_manager.addParameter(&p_thingspeakApiKey);
ESP8266_W5500_manager.addParameter(&p_sensorDht22);
ESP8266_W5500_manager.addParameter(&p_pinSda);
ESP8266_W5500_manager.addParameter(&p_pinScl);
4. Save the variables configured in Config Portal (CP)
When the CP exits, we have to store the parameters’ values that users input via CP to use later.
For ESP8266, that can be EEPROM or SPIFFS.
We can write directly to a well-defined structure of our choice, but the current example is using JSON to be portable but much more complicated and not advised for new users.
4.1 Getting variables’ data from CP
After users select Save, the CP ESP8266_W5500_Manager object will save the user input data into related ESP8266_EMParameter objects.
We can now retrieve the data, using getValue() function, for each ESP8266_EMParameter object. Then we can utilize the data for our purpose, such as thingspeakApiKey to log in, sensorDht22 type to know how to handle the sensor, pinSda and pinSda to know which pins to use to communicate with the DHT sensor.
The code is as follows:
// Getting posted form values and overriding local variables parameters// Config file is written regardless the connection statestrcpy(thingspeakApiKey, p_thingspeakApiKey.getValue());
sensorDht22 = (strncmp(p_sensorDht22.getValue(), "T", 1) == 0);
pinSda = atoi(p_pinSda.getValue());
pinScl = atoi(p_pinScl.getValue());
We can also save to FS file to use later in next boot.
// Writing JSON config file to flash for next bootwriteConfigFile();
5. Write to FS (SPIFFS, LittleFS, etc.) using JSON format
First, you have to familiarize yourself with ArduinoJson library, its functions, the disruptive differences between ArduinoJson version 5.x.x- and v6.0.0+. The best documentation can be found at The best JSON library for embedded C++.
This documentation will discuss only ArduinoJson v6.x.x+ (ARDUINOJSON_VERSION_MAJOR >= 6)
Then have a look at the code snippet of writeConfigFile() function and the following step-by-step explanations.
boolwriteConfigFile()
{
Serial.println("Saving config file");
#if (ARDUINOJSON_VERSION_MAJOR >= 6)
DynamicJsonDocument json(1024);
#else
DynamicJsonBuffer jsonBuffer;
JsonObject& json = jsonBuffer.createObject();
#endif// JSONify local configuration parameters
json[ThingSpeakAPI_Label] = thingspeakApiKey;
json[SensorDht22_Label] = sensorDht22;
json[PinSDA_Label] = pinSda;
json[PinSCL_Label] = pinScl;
// Open file for writing
File f = FileFS.open(CONFIG_FILE, "w");
if (!f)
{
Serial.println("Failed to open config file for writing");
returnfalse;
}
#if (ARDUINOJSON_VERSION_MAJOR >= 6)
serializeJsonPretty(json, Serial);
// Write data to file and close itserializeJson(json, f);
#else
json.prettyPrintTo(Serial);
// Write data to file and close it
json.printTo(f);
#endif
f.close();
Serial.println("\nConfig file was successfully saved");
returntrue;
}
5.1 Create a DynamicJsonDocument Object
We’ll create an object with size 1024 bytes, enough to hold our data:
DynamicJsonDocument json(1024);
5.2 Fill the DynamicJsonDocument Object with data got from Config Portal
Then JSONify all local parameters we’ve just received from CP and wish to store into FS by using the function prototype:
Now just open the file for writing, and abort if open-for-writing error:
// Open file for writing
File f = FileFS.open(CONFIG_FILE, "w");
if (!f)
{
Serial.println("Failed to open config file for writing");
returnfalse;
}
5.4 Write the Jsonified data to CONFIG_FILE
As simple as this single command to write the whole json object we declared then filled with data in steps 5.1 and 5.2
// Write data to file and close itserializeJson(json, f);
5.5 Close CONFIG_FILE to flush and save the data
Soooo simple !!! Now everybody can do it.
f.close();
But HOWTO use the saved data in the next startup ???? That’s in next step 6.
6. Read from FS using JSON format
Now, you have familiarized yourself with ArduinoJson library, its functions. We’ll discuss HOWTO read data from the CONFIG_FILE in Jsonified format, then HOWTO parse the to use.
The documentation will discuss only ArduinoJson v6.x.x+ (ARDUINOJSON_VERSION_MAJOR >= 6)
First, have a look at the code snippet of readConfigFile() function.
boolreadConfigFile()
{
// this opens the config file in read-mode
File f = FileFS.open(CONFIG_FILE, "r");
if (!f)
{
Serial.println("Configuration file not found");
returnfalse;
}
else
{
// we could open the filesize_t size = f.size();
// Allocate a buffer to store contents of the file.
std::unique_ptr<char[]> buf(newchar[size + 1]);
// Read and store file contents in buf
f.readBytes(buf.get(), size);
// Closing file
f.close();
// Using dynamic JSON buffer which is not the recommended memory model, but anyway// See https://github.com/bblanchon/ArduinoJson/wiki/Memory%20model
#if (ARDUINOJSON_VERSION_MAJOR >= 6)
DynamicJsonDocument json(1024);
auto deserializeError = deserializeJson(json, buf.get());
if ( deserializeError )
{
Serial.println("JSON parseObject() failed");
returnfalse;
}
serializeJson(json, Serial);
#else
DynamicJsonBuffer jsonBuffer;
// Parse JSON string
JsonObject& json = jsonBuffer.parseObject(buf.get());
// Test if parsing succeeds.if (!json.success())
{
Serial.println("JSON parseObject() failed");
returnfalse;
}
json.printTo(Serial);
#endif// Parse all config file parameters, override// local config variables with parsed valuesif (json.containsKey(ThingSpeakAPI_Label))
{
strcpy(thingspeakApiKey, json[ThingSpeakAPI_Label]);
}
if (json.containsKey(SensorDht22_Label))
{
sensorDht22 = json[SensorDht22_Label];
}
if (json.containsKey(PinSDA_Label))
{
pinSda = json[PinSDA_Label];
}
if (json.containsKey(PinSCL_Label))
{
pinScl = json[PinSCL_Label];
}
}
Serial.println("\nConfig file was successfully parsed");
returntrue;
}
and the following step-by-step explanations.
6.1 Open CONFIG_FILE to read
As simple as this
// this opens the config file in read-mode
File f = FileFS.open(CONFIG_FILE, "r");
We’ll inform and abort if the CONFIG_FILE can’t be opened (file not found, can’t be opened, etc.)
if (!f)
{
Serial.println("Configuration file not found");
returnfalse;
}
6.2 Open CONFIG_FILE to read
Now we have to determine the file size to create a buffer large enough to store the to-be-read data
// we could open the filesize_t size = f.size();
// Allocate a buffer to store contents of the file.
std::unique_ptr<char[]> buf(newchar[size + 1]);
Remember always add 1 to the buffer length to store the terminating 0.
Then just read the file into the buffer, and close the file to be safe
// Read and store file contents in buf
f.readBytes(buf.get(), size);
// Closing file
f.close();
6.3 Populate the just-read Jsonified data into the DynamicJsonDocument json object
We again use the same DynamicJsonDocument json object to store the data we’ve just read from CONFIG_FILE.
Why the same complicated DynamicJsonDocument json object ?? Because in steps 5, we did store Jsonified data using the same DynamicJsonDocument json object. It’s much easier we now use it again to facilitate the parsing of Jsonified data back to the data we can use easily.
We first create the object with enough size
DynamicJsonDocument json(1024);
then populate it with data from buffer we read from CONFIG_FILE in step 6.2, pre-parse and check for error. All is done just by one command deserializeJson()
auto deserializeError = deserializeJson(json, buf.get());
Abort if there is any data error in the process of writing, storing, reading back. If OK, just nicely print out to the Debug Terminal
6.4 Parse the Jsonified data from the DynamicJsonDocument json object to store into corresponding parameters
This is as simple as in the step 5.2, but in reverse direction.
To be sure there is good corresponding data, not garbage, for each variable, we have to perform sanity checks by
verifying the DynamicJsonDocument json object still contains the correct keys we passed to it when we wrote into CONFIG_FILE.
For example:
if (json.containsKey(ThingSpeakAPI_Label))
Then proceed to get every parameter we know we stored there from last CP Save.
// Parse all config file parameters, override// local config variables with parsed valuesif (json.containsKey(ThingSpeakAPI_Label))
{
strcpy(thingspeakApiKey, json[ThingSpeakAPI_Label]);
}
if (json.containsKey(SensorDht22_Label))
{
sensorDht22 = json[SensorDht22_Label];
}
if (json.containsKey(PinSDA_Label))
{
pinSda = json[PinSDA_Label];
}
if (json.containsKey(PinSCL_Label))
{
pinScl = json[PinSCL_Label];
}
6.5 Then what to do now
Just use those parameters for whatever purpose you designed them for in step 1:
The application will use DHT sensor (either DHT11 or DHT22) and need to connect to ThingSpeak with unique user's API Key. The DHT sensor is connected to the ESP boards using SDA/SCL pins which also need to be configurable.
So, how it works?
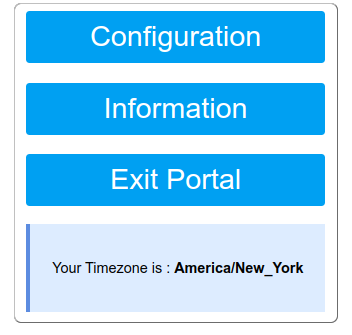
In ConfigPortal Mode, it starts an access point @ the current Static or DHCP IP.
Connect to it by going to, e.g. http://192.168.2.186, you’ll see this Main page:
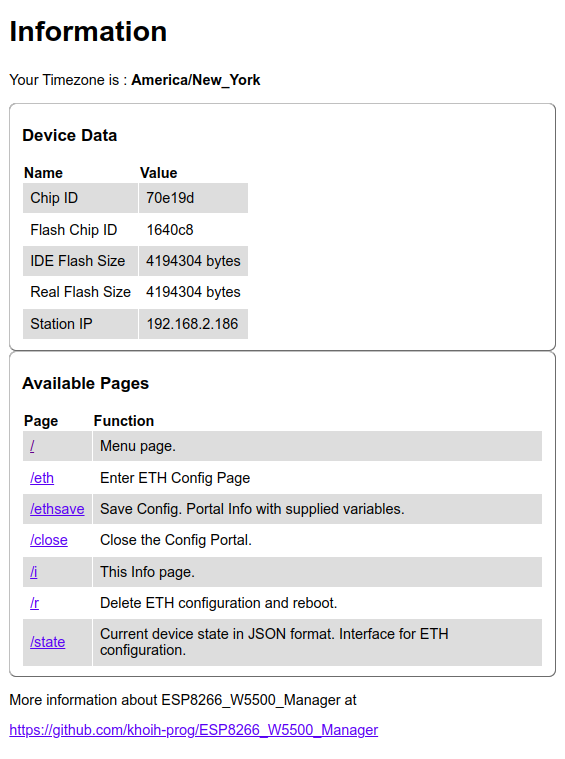
Select Information to enter the Info page where the board info will be shown (long page)
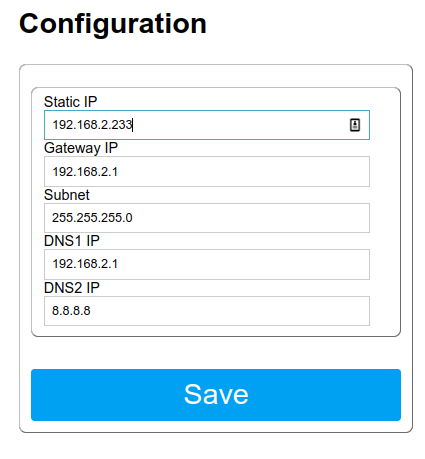
Select Configuration to enter this page where you can modify its Credentials
Enter your credentials, then click Save. The Credentials will be saved and the board continues, or reboots if necessary, to connect to the selected Static IP or DHCP.
If you’re already satisfied with the current settings and don’t want to change anything, just select Exit Portal from the Main page to continue or reboot the board and connect using the previously-stored Credentials.
Documentation
Password protect the configuration Access Point
You can password protect the ConfigPortal AP. Check ESP8266_FSWebServer example
Callbacks
Save settings
This gets called when custom parameters have been set AND a connection has been established. Use it to set a flag, so when all the configuration finishes, you can save the extra parameters somewhere.
//flag for saving databool shouldSaveConfig = false;
//callback notifying us of the need to save configvoidsaveConfigCallback ()
{
Serial.println("Should save config");
shouldSaveConfig = true;
}
ConfigPortal Timeout
If you need to set a timeout so the ESP8266 doesn’t hang waiting to be configured for ever.
which will wait 2 minutes (120 seconds). When the time passes, the startConfigPortal() function will return and continue the sketch,
unless you’re accessing the Config Portal. In this case, the startConfigPortal() function will stay until you save config data or exit
the Config Portal.
On Demand ConfigPortal
Example usage
voidloop()
{
// is configuration portal requested?if ((digitalRead(TRIGGER_PIN) == LOW) || (digitalRead(TRIGGER_PIN2) == LOW))
{
Serial.println(F("\nConfiguration portal requested."));
digitalWrite(LED_BUILTIN, LED_ON); // turn the LED on by making the voltage LOW to tell us we are in configuration mode.//Local initialization. Once its business is done, there is no need to keep it around// Use this to default DHCP hostname to ESP8266-XXXXXX//ESP8266_W5500_Manager ESP8266_W5500_manager;// Use this to personalize DHCP hostname (RFC952 conformed)
ESP8266_W5500_Manager ESP8266_W5500_manager("ConfigOnSwitch");
#if !USE_DHCP_IP
#if USE_CONFIGURABLE_DNS
// Set static IP, Gateway, Subnetmask, DNS1 and DNS2
ESP8266_W5500_manager.setSTAStaticIPConfig(stationIP, gatewayIP, netMask, dns1IP, dns2IP);
#else// Set static IP, Gateway, Subnetmask, Use auto DNS1 and DNS2.
ESP8266_W5500_manager.setSTAStaticIPConfig(stationIP, gatewayIP, netMask);
#endif
#endif
#if USING_CORS_FEATURE
ESP8266_W5500_manager.setCORSHeader("Your Access-Control-Allow-Origin");
#endif//Check if there is stored credentials.//If not found, device will remain in configuration mode until switched off via webserver.
Serial.println(F("Opening configuration portal. "));
if (loadConfigData())
{
//If no access point name has been previously entered disable timeout.
ESP8266_W5500_manager.setConfigPortalTimeout(120);
Serial.println(F("Got stored Credentials. Timeout 120s for Config Portal"));
}
else
{
// Enter CP only if no stored SSID on flash and file
ESP8266_W5500_manager.setConfigPortalTimeout(0);
Serial.println(F("Open Config Portal without Timeout: No stored Credentials."));
initialConfig = true;
}
//Starts an access point//and goes into a blocking loop awaiting configurationif (!ESP8266_W5500_manager.startConfigPortal())
Serial.println(F("Not connected to ETH network but continuing anyway."));
else
{
Serial.println(F("ETH network connected...yeey :)"));
Serial.print(F("Local IP: "));
Serial.println(eth.localIP());
}
#if USE_ESP_ETH_MANAGER_NTP
String tempTZ = ESP8266_W5500_manager.getTimezoneName();
if (strlen(tempTZ.c_str()) < sizeof(Ethconfig.TZ_Name) - 1)
strcpy(Ethconfig.TZ_Name, tempTZ.c_str());
elsestrncpy(Ethconfig.TZ_Name, tempTZ.c_str(), sizeof(Ethconfig.TZ_Name) - 1);
constchar * TZ_Result = ESP8266_W5500_manager.getTZ(Ethconfig.TZ_Name);
if (strlen(TZ_Result) < sizeof(Ethconfig.TZ) - 1)
strcpy(Ethconfig.TZ, TZ_Result);
elsestrncpy(Ethconfig.TZ, TZ_Result, sizeof(Ethconfig.TZ_Name) - 1);
if ( strlen(Ethconfig.TZ_Name) > 0 )
{
LOGERROR3(F("Saving current TZ_Name ="), Ethconfig.TZ_Name, F(", TZ = "), Ethconfig.TZ);
configTime(Ethconfig.TZ, "pool.ntp.org");
}
else
{
LOGERROR(F("Current Timezone Name is not set. Enter Config Portal to set."));
}
#endif
ESP8266_W5500_manager.getSTAStaticIPConfig(EthSTA_IPconfig);
saveConfigData();
#if !USE_DHCP_IP
// Reset to use new Static IP, if different from current eth.localIP()if (eth.localIP() != EthSTA_IPconfig._sta_static_ip)
{
Serial.print(F("Current IP = "));
Serial.print(eth.localIP());
Serial.print(F(". Reset to take new IP = "));
Serial.println(EthSTA_IPconfig._sta_static_ip);
ESP.reset();
delay(2000);
}
#endifdigitalWrite(LED_BUILTIN, LED_OFF); // Turn led off as we are not in configuration mode.
}
// put your main code here, to run repeatedlycheck_status();
}
Many applications need configuration parameters like MQTT host and port, Blynk or emoncms tokens, etc. While it is possible to use ESP8266_W5500_Manager to collect additional parameters, it is better to read these parameters from a web service once ESP8266_W5500_Manager has been used to connect to the Internet.
To capture other parameters with ESP8266_W5500_Manager is a little bit more complicated than all the other features. This requires adding custom HTML to your form.
There are various ways in which you can inject custom HTML, CSS or Javascript into the ConfigPortal.
The options are:
inject custom head element
You can use this to any html bit to the head of the ConfigPortal. If you add a <style> element, keep in mind it overwrites the included css, not replaces.
You can change the CS/SS pin to another one. Default is GPIO16
Connecting CS/SS to TX0/GPIO15 interferes with uploading firmware to ESP8266. If absolutely necessary to use TX0/GPIO15, remove the wire to TX0/GPIO15 before uploading firmware. Then reconnect after done uploading.
// Reset to use new Static IP, if different from current eth.localIP()
if (eth.localIP() != EthSTA_IPconfig._sta_static_ip)
{
Serial.print(F(“Current IP = “));
Serial.print(eth.localIP());
Serial.print(F(“. Reset to take new IP = “));
Serial.println(EthSTA_IPconfig._sta_static_ip);
ESP.reset();
delay(2000);
}
#endif
digitalWrite(LED_BUILTIN, LED_OFF); // Turn led off as we are not in configuration mode.
}
// put your main code here, to run repeatedly
check_status();
}
Debug Terminal Output Samples
1. ConfigOnDoubleReset_TZ using LittleFS on ESP8266_DEV with ESP8266_W5500
1.1 DRD => Config Portal
This is terminal debug output when running ConfigOnDoubleReset on ESP8266_W5500. Config Portal was requested by DRD to input and save Credentials, such as Static IP address.
Starting ConfigOnDoubleReset_TZ using LittleFS on ESP8266_NODEMCU_ESP12E with ESP8266_W5500 Ethernet
ESP8266_W5500_Manager v1.0.0
ESP_DoubleResetDetector v1.3.2
[EM] RFC925 Hostname = ConfigOnDoubleReset_TZ
[EM] setSTAStaticIPConfig
[EM] Set CORS Header to :  Your Access-Control-Allow-Origin
[EM] LoadCfgFile
[EM] OK
[EM] stationIP = 192.168.2.186 , gatewayIP = 192.168.2.1
[EM] netMask = 255.255.255.0
[EM] dns1IP = 192.168.2.1 , dns2IP = 8.8.8.8
Got stored Credentials. Timeout 120s for Config Portal
[EM] Current TZ_Name = America/New_York , TZ =  EST5EDT,M3.2.0,M11.1.0
[EM] Default SPI pinout:
[EM] MOSI: 13
[EM] MISO: 12
[EM] SCK: 14
[EM] CS: 16
[EM] =========================
Connecting to network :
Ethernet Static IP address: 192.168.2.186
LittleFS Flag read = 0xD0D01234
doubleResetDetected
Saving config file...
Saving config file OK
Open Config Portal without Timeout: Double Reset Detected
Starting configuration portal @ 192.168.2.186
_domainName = *
_resolvedIP = 192.168.2.186
_port = 53
[EM] _configPortalStart millis() = 354
[EM] Config Portal IP address = 192.168.2.186
[EM] HTTP server started
[EM] startConfigPortal : Enter loop
[EM] handleRoot
[EM] captivePortal: hostHeader =  192.168.2.186
[EM] Handle ETH
[EM] Static IP = 192.168.2.186
[EM] Sent config page
[EM] ETH save
[EM] TZ name = America/New_York
[EM] New Static IP = 192.168.2.188
[EM] New Static Gateway = 192.168.2.1
[EM] New Static Netmask = 255.255.255.0
[EM] New Static DNS1 = 192.168.2.1
[EM] New Static DNS2 = 8.8.8.8
[EM] Sent eth save page
[EM] stopConfigPortal
ETH network connected...yeey :)
[EM] Saving current TZ_Name = America/New_York , TZ =  EST5EDT,M3.2.0,M11.1.0
[EM] getSTAStaticIPConfig
[EM] SaveCfgFile
[EM] stationIP = 192.168.2.188 , gatewayIP = 192.168.2.1
[EM] netMask = 255.255.255.0
[EM] dns1IP = 192.168.2.1 , dns2IP = 8.8.8.8
[EM] OK
Current IP = 192.168.2.186. Reset to take new IP = 192.168.2.188
ets Jan  8 2013,rst cause:2, boot mode:(3,6)
1.2. Get new Static IP after reset
Starting ConfigOnDoubleReset_TZ using LittleFS on ESP8266_NODEMCU_ESP12E with ESP8266_W5500 Ethernet
ESP8266_W5500_Manager v1.0.0
ESP_DoubleResetDetector v1.3.2
[EM] RFC925 Hostname = ConfigOnDoubleReset_TZ
[EM] setSTAStaticIPConfig
[EM] Set CORS Header to :  Your Access-Control-Allow-Origin
[EM] LoadCfgFile
[EM] OK
[EM] stationIP = 192.168.2.188 , gatewayIP = 192.168.2.1
[EM] netMask = 255.255.255.0
[EM] dns1IP = 192.168.2.1 , dns2IP = 8.8.8.8
Got stored Credentials. Timeout 120s for Config Portal
[EM] Current TZ_Name = America/New_York , TZ =  EST5EDT,M3.2.0,M11.1.0
[EM] Default SPI pinout:
[EM] MOSI: 13
[EM] MISO: 12
[EM] SCK: 14
[EM] CS: 16
[EM] =========================
Connecting to network :
Ethernet Static IP address: 192.168.2.188
LittleFS Flag read = 0xD0D04321
No doubleResetDetected
Saving config file...
Saving config file OK
After waiting 0.00 secs more in setup(), connection result is connected. Local IP: 192.168.2.188
[EM] freeing allocated params!
Stop doubleResetDetecting
Saving config file...
Saving config file OK
Local Date/Time: Sun Dec 11 18:23:34 2022
Local Date/Time: Sun Dec 11 18:24:34 2022
Local Date/Time: Sun Dec 11 18:25:34 2022
Local Date/Time: Sun Dec 11 18:26:34 2022
Local Date/Time: Sun Dec 11 18:27:34 2022
Local Date/Time: Sun Dec 11 18:28:34 2022
2. ConfigOnSwichFS using LittleFS on ESP8266_DEV with ESP8266_W5500
This is terminal debug output when running ConfigOnSwichFS on ESP8266_W5500. Config Portal was requested to input and save Credentials.
Starting ConfigOnSwichFS using LittleFS on ESP8266_NODEMCU_ESP12E with ESP8266_W5500 Ethernet
ESP8266_W5500_Manager v1.0.0
{"thingspeakApiKey":"","SensorDHT22":true,"PinSda":4,"PinScl":5}
Config file was successfully parsed
[EM] RFC925 Hostname = ConfigOnSwitchFS
[EM] setSTAStaticIPConfig
[EM] Set CORS Header to :  Your Access-Control-Allow-Origin
[EM] LoadCfgFile
[EM] OK
[EM] stationIP = 192.168.2.186 , gatewayIP = 192.168.2.1
[EM] netMask = 255.255.255.0
[EM] dns1IP = 192.168.2.1 , dns2IP = 8.8.8.8
Got stored Credentials. Timeout 120s for Config Portal
Current Timezone is not set. Enter Config Portal to set.
[EM] Default SPI pinout:
[EM] MOSI: 13
[EM] MISO: 12
[EM] SCK: 14
[EM] CS: 16
[EM] =========================
Connecting to network :
Ethernet Static IP address: 192.168.2.186
After waiting 0.00 secs more in setup(), connection result is connected. Local IP: 192.168.2.186
[EM] freeing allocated params!

Configuration portal requested.
[EM] RFC925 Hostname = ConfigOnSwitchFS
Opening configuration portal.
[EM] LoadCfgFile
[EM] OK
[EM] stationIP = 192.168.2.186 , gatewayIP = 192.168.2.1
[EM] netMask = 255.255.255.0
[EM] dns1IP = 192.168.2.1 , dns2IP = 8.8.8.8
Got stored Credentials. Timeout 120s for Config Portal
[EM] Adding parameter thingspeakApiKey
[EM] Adding parameter SensorDHT22
[EM] Adding parameter PinSda
[EM] Adding parameter PinScl
[EM] setSTAStaticIPConfig for USE_CONFIGURABLE_DNS
[EM] Set CORS Header to :  Your Access-Control-Allow-Origin
[EM] _configPortalStart millis() = 26788
[EM] Config Portal IP address = 192.168.2.186
[EM] HTTP server started
[EM] startConfigPortal : Enter loop
[EM] handleRoot
[EM] request host IP = 192.168.2.186
[EM] Info
[EM] Info page sent
[EM] handleRoot
[EM] request host IP = 192.168.2.186
[EM] Handle ETH
[EM] Static IP = 192.168.2.186
[EM] Sent config page
[EM] ETH save
[EM] TZ = America/Toronto
[EM] Parameter and value : thingspeakApiKey
[EM] Parameter and value : SensorDHT22 T
[EM] Parameter and value : PinSda 4
[EM] Parameter and value : PinScl 5
[EM] New Static IP = 192.168.2.186
[EM] New Static Gateway = 192.168.2.1
[EM] New Static Netmask = 255.255.255.0
[EM] New Static DNS1 = 192.168.2.1
[EM] New Static DNS2 = 8.8.8.8
[EM] Sent eth save page
[EM] stopConfigPortal
ETH network connected...yeey :)
Local IP: 192.168.2.186
[EM] Saving current TZ_Name = America/Toronto , TZ =  EST5EDT,M3.2.0,M11.1.0
[EM] getSTAStaticIPConfig
[EM] SaveCfgFile
[EM] stationIP = 192.168.2.186 , gatewayIP = 192.168.2.1
[EM] netMask = 255.255.255.0
[EM] dns1IP = 192.168.2.1 , dns2IP = 8.8.8.8
[EM] OK
Saving config file
{
  "thingspeakApiKey": "",
  "SensorDHT22": true,
  "PinSda": 4,
  "PinScl": 5
}
Config file was successfully saved
Current IP = 192.168.2.186. Reset to take new IP = 192.168.2.186
ets Jan  8 2013,rst cause:2, boot mode:(3,6)

...

Starting ConfigOnSwichFS using LittleFS on ESP8266_NODEMCU_ESP12E with ESP8266_W5500 Ethernet
ESP8266_W5500_Manager v1.0.0
{"thingspeakApiKey":"","SensorDHT22":true,"PinSda":4,"PinScl":5}
Config file was successfully parsed
[EM] RFC925 Hostname = ConfigOnSwitchFS
[EM] setSTAStaticIPConfig
[EM] Set CORS Header to :  Your Access-Control-Allow-Origin
[EM] LoadCfgFile
[EM] OK
[EM] stationIP = 192.168.2.186 , gatewayIP = 192.168.2.1
[EM] netMask = 255.255.255.0
[EM] dns1IP = 192.168.2.1 , dns2IP = 8.8.8.8
Got stored Credentials. Timeout 120s for Config Portal
[EM] Current TZ_Name = America/Toronto , TZ =  EST5EDT,M3.2.0,M11.1.0
[EM] Default SPI pinout:
[EM] MOSI: 13
[EM] MISO: 12
[EM] SCK: 14
[EM] CS: 16
[EM] =========================
Connecting to network :
Ethernet Static IP address: 192.168.2.186
After waiting 0.00 secs more in setup(), connection result is connected. Local IP: 192.168.2.186
[EM] freeing allocated params!
Local Date/Time: Fri Dec  9 23:05:29 2022
Local Date/Time: Fri Dec  9 23:06:29 2022
3. ESP8266_FSWebServer_DRD using LittleFS on ESP8266_DEV with ESP8266_W5500
The terminal debug output demonstrate the upload the contents of the data folder to ESP8266 LittleFS using the following command
for file in `\ls -A1`; do curl -F "file=@$PWD/$file" 192.168.2.186/edit; done
Starting ESP_FSWebServer_DRD using LittleFS on ESP8266_NODEMCU_ESP12E with ESP8266_W5500 Ethernet
ESP8266_W5500_Manager v1.0.0
ESP_DoubleResetDetector v1.3.2
Opening / directory
FS File: PM2_5_Log.csv, size: 40B
FS File: drd.dat, size: 4B
FS File: eth_cred.dat, size: 142B
FS File: timezone.dat, size: 32B

[EM] RFC925 Hostname = ESP-FSWebServerDRD
[EM] setSTAStaticIPConfig
[EM] Set CORS Header to :  Your Access-Control-Allow-Origin
[EM] LoadCfgFile
[EM] OK
[EM] stationIP = 192.168.2.186 , gatewayIP = 192.168.2.1
[EM] netMask = 255.255.255.0
[EM] dns1IP = 192.168.2.1 , dns2IP = 8.8.8.8
[EM] Default SPI pinout:
[EM] MOSI: 13
[EM] MISO: 12
[EM] SCK: 14
[EM] CS: 16
[EM] =========================
Connecting to network :
Ethernet Static IP address: 192.168.2.186
LittleFS Flag read = 0xD0D04321
No doubleResetDetected
Saving config file...
Saving config file OK
After waiting 0.00 secs more in setup(), connection result is connected. Local IP: 192.168.2.186
HTTP server started @ 192.168.2.186
===============================================================
Open http://192.168.2.186/edit.htm to see the file browser
Using username = admin and password = admin
===============================================================
[EM] freeing allocated params!
Stop doubleResetDetecting
Saving config file...
Saving config file OK
handleFileRead: /
handleFileRead: /edit.htm
handleFileRead: /edit.htm
handleFileRead: /
handleFileUpload Name: /CanadaFlag_1.png
handleFileUpload Size: 41214
handleFileUpload Name: /CanadaFlag_2.png
handleFileUpload Size: 8311
handleFileUpload Name: /CanadaFlag_3.jpg
handleFileUpload Size: 11156
handleFileUpload Name: /edit.htm.gz
handleFileUpload Size: 4116
handleFileUpload Name: /favicon.ico
handleFileUpload Size: 1150
handleFileUpload Name: /graphs.js.gz
handleFileUpload Size: 1971
handleFileUpload Name: /index.htm
handleFileUpload Size: 3721
handleFileRead: /
handleFileRead: /graphs.js
handleFileRead: /edit.htm
handleFileRead: /index.htm
handleFileList: /
handleFileRead: /CanadaFlag_1.png
Then after restart, the uploaded files are shown in / directory
Starting ESP_FSWebServer_DRD using LittleFS on ESP8266_NODEMCU_ESP12E with ESP8266_W5500 Ethernet
ESP8266_W5500_Manager v1.0.0
ESP_DoubleResetDetector v1.3.2
Opening / directory
FS File: CanadaFlag_1.png, size: 40.25KB
FS File: CanadaFlag_2.png, size: 8.12KB
FS File: CanadaFlag_3.jpg, size: 10.89KB
FS File: PM2_5_Log.csv, size: 40B
FS File: drd.dat, size: 4B
FS File: edit.htm.gz, size: 4.02KB
FS File: eth_cred.dat, size: 142B
FS File: favicon.ico, size: 1.12KB
FS File: graphs.js.gz, size: 1.92KB
FS File: index.htm, size: 3.63KB
FS File: timezone.dat, size: 32B

[EM] RFC925 Hostname = ESP-FSWebServerDRD
[EM] setSTAStaticIPConfig
[EM] Set CORS Header to :  Your Access-Control-Allow-Origin
[EM] LoadCfgFile
[EM] OK
[EM] stationIP = 192.168.2.186 , gatewayIP = 192.168.2.1
[EM] netMask = 255.255.255.0
[EM] dns1IP = 192.168.2.1 , dns2IP = 8.8.8.8
[EM] Default SPI pinout:
[EM] MOSI: 13
[EM] MISO: 12
[EM] SCK: 14
[EM] CS: 16
[EM] =========================
Connecting to network :
Ethernet Static IP address: 192.168.2.186
LittleFS Flag read = 0xD0D04321
No doubleResetDetected
Saving config file...
Saving config file OK
After waiting 0.00 secs more in setup(), connection result is connected. Local IP: 192.168.2.186
HTTP server started @ 192.168.2.186
===============================================================
Open http://192.168.2.186/edit.htm to see the file browser
Using username = admin and password = admin
===============================================================
[EM] freeing allocated params!
Debug
Debug is enabled by default on Serial. To disable, add before startConfigPortal()
ESP8266_W5500_manager.setDebugOutput(false);
You can also change the debugging level from 0 to 4
// Use from 0 to 4. Higher number, more debugging messages and memory usage.
#define_ESP8266_ETH_MGR_LOGLEVEL_3
Troubleshooting
If you get compilation errors, more often than not, you may need to install a newer version of the ESP8266 core for Arduino.
Sometimes, the library will only work if you update the ESP8266 core to the latest version because I am using some newly added function.
If you connect to the created configuration Access Point but the ConfigPortal does not show up, just open a browser and type in the IP of the web portal, by default 192.168.2.186.
This proof of concept (POC) investigates how Datomic principles can be adapted for the frontend environment.
It introduces a peer library, written in JavaScript, that is capable of navigating a DataScript database and storing its segments in the browser’s cache.
This approach is useful for productivity tools like Asana, Jira, Slack, and Notion,
especially for applications that work with relatively large databases in the browser.
It is necessary to make fast queries on that data without access to the backend.
The project is built upon the React TodoMVC framework.
The project’s capabilities include:
Range queries.
Lazy iteration over databases by fetching database segments on-demand from the backend.
Long-term storage of these segments within the browser cache.
Getting a consistent snapshot of a database.
For those unfamiliar with Datomic-like databases, here’s an illustrative example of its core concept:
Consider a traditional database such as PostgreSQL or MySQL,
where data resides on the server’s disk and your application’s queries are processed on the server.
If you decide to cache a slow query’s result within your application,
you essentially forego the query engine, reducing it to key-value (KV) storage.
In contrast, a Datomic-like system enables you to execute queries within your application utilizing its cache.
Hazel is designed to read indexes built by DataScript.
However, unlike DataScript, it provides an asynchronous API for data querying and loads storage segments on-demand.
You should first be familiar with the DataScript or Datomic data model. If not, please refer to the following resources:
The DataScript database operates on datoms, which are atomic units of data. Each Datom is represented as a tuple (E, A, V), where:
E stands for the entity ID,
A for the attribute, and
V for the value.
These elements form the core structure of a Datom. To efficiently organize datoms, DataScript uses three indexes: EAV, AEV, and AVE. The name of each index reflects the order in which datoms are sorted:
EAV: Sorted by entity ID, then attribute, then value.
AEV and AVE: Follow analogous patterns.
While datoms in Datomic and DataScript also include an additional element T (Transaction ID), Hazel simplifies the model by excluding this component.
Index Implementation
The indexes in DataScript are implemented as Persistent Sorted Sets, a type of immutable data structure based on B+ trees. These structures are optimized for storing elements in sorted order and enable efficient operations such as lookups, insertions, and deletions, with a time complexity of $$O(\log n)$$. Functional immutability is achieved through structural sharing, ensuring that updates reuse existing data whenever possible. A detailed explanation of B-trees, including their variation B+ trees, can be found in the paper “The Ubiquitous B-Tree” by Douglas Comer.
Each node of the tree corresponds to a storage segment, serialized and stored persistently. Branch nodes contain keys and addresses for navigation, while leaf nodes store ordered sequences of keys (datoms).
Database Implementation
In DataScript, changes are made using transactions, which are represented as structured data. While a comprehensive understanding of the entire transaction process is not required, it’s important to note that transactions are represented as a collections of datoms. Each Datom in transaction includes a flag that indicates whether it will be added to or removed from the database.
Since persistent data structures can lead to high overhead when updating the entire tree for every transaction, DataScript employs an optimization mechanism that relies on an append-only “tail” for managing updates:
Changes are stored in the “tail”.
Once the size of the tail becomes comparable to a tree node, the “tail” is “flushed” into the tree.
For implementation details, see the source code.
Hazel’s Peer
In Datomic and DataScript, separate APIs are used for querying and mutating data. The Peer library is responsible for querying data. Moreover, it executes queries using a local cache.
Ultimately, Datomic and DataScript provide low-level API for querying data:
First, let’s consider the Datomic and DataScript implementations for the JVM.
When querying data, they access storage segments stored remotely or in a local cache.
This access uses blocking I/O, and the result of the queries is a lazy sequence.
Here are the advantages of this approach:
It allows processing data that exceeds the size of RAM.
It allows stopping lazy sequence consumption, which prevents further loading of the next segments.
Second, let’s examine the DataScript implementation for ClojureScript (JS).
It shares the same codebase as the JVM implementation and, as a result, has the same API. However, in JavaScript, blocking I/O cannot be used for retrieving segments, unlike in the JVM. This limitation means that DataScript in JavaScript can operate only with data stored in RAM.
Hazel is designed to overcome this limitation.
In JavaScript, the equivalent of lazy sequences is a Generator function (function*/yield). However, since segments are requested asynchronously over the network, Hazel uses AsyncGenerator to manage this process.
Here are some examples:
A range query:
forasync(const[e,_a,_v]ofdb.ave.datoms('task/completed',true)){// Retrieve datoms with the attribute `task/completed` and value `true`.// ...}
NOTE: The index name matters. In the first example, the AVE index is used, while in the second example, the EAV index is used.
Finally, the Cache API is used to cache segments.
For more details, see the documentation here.
Learning by Example
A motivated reader can easily grasp these concepts by reviewing the provided tests, which offer clear examples and practical insights. Additional details on persistent B+ trees and storage mechanisms in DataScript can be found in the following references:
I’ve only implemented the methods (r)seek and datoms over indexes.
The main drawback I’ve found is access control.
For instance, consider an Asana project; it has tasks and collaborators, and each collaborator can read all tasks of the project.
I think we should store data per project database.
However, the problem is that we cannot just add an external collaborator to a task of this project
because our database is cached in the browser, and this collaborator will have access to all the data in the database.
I have two solutions for this problem:
Having an additional API for data access that runs queries on the backend, where we can easily handle access control, although we would lose caching.
Spreading (replicate) copies of a task across many databases (projects).
If you have any thoughts, feel free to open an issue in this repository.
Future work
It is possible to implement datalog
and other Datomic/DataScript APIs.
It may be possible to adopt this approach for the local-first paradigm.
For example, we can implement Conflict-free Replicated Data Types (CRDT)
by writing database functions in JavaScript and optimistically transacting them on the frontend side.
ITT is a virtual knowledge graph system implementing the Intermediate Triple Table architecture. It allows to access heterogeneous data as a knowledge graph using the R2RML and RML mapping languages.
ITT uses ConnectorX to access relational databases and the connection URLs must be formatted according to this engine. For Postgres the format is postgresql://username:password@host:port/database and for MySQL the format is mysql://username:password@host:port/database. See the details here.
For MongoDB the connection URL format is mongodb://localhost:27017/database. Example config file for MongoDB:
@article{arenas2025itt,
  title = {Intermediate triple table: A general architecture for virtual knowledge graphs},
  author = {Julián Arenas-Guerrero and Oscar Corcho and María S. Pérez},
  journal = {Knowledge-Based Systems},
  volume = {314},
  pages = {113179},
  year = {2025},
  publisher = {Elsevier},
  issn = {0950-7051},
  doi = {10.1016/j.knosys.2025.113179},
}
At its core, DigitalSteering employs sophisticated algorithms to interpret user inputs and translate them into virtual steering commands. The program mimics the functionality of a physical steering wheel, allowing users to navigate and control in-game vehicles with precision.
Why DigitalSteering?
One of the primary goals of DigitalSteering is to break down barriers in gaming accessibility. By offering diverse and customizable control methods, it caters to a broader audience, including individuals with different physical abilities and disabilities.
DigitalSteering takes a step further by addressing the specific needs of individuals with limited mobility, particularly those without the use of arms or hands. The project incorporates adaptive technologies to empower gamers facing physical challenges, providing them with a means to enjoy gaming on equal terms.
Guide
We have a vscode and pycharm guide. Please ask if you need help for a different application
For offsetting the degrees please insert the integer to the range of 0 (Normal) to 365 (Full Offset). Please change accordingly
Sensitivity is for changing how many degrees to steer. The less it is, more steering is required to turn. The more it is, less steering is required to turn. Please change accordingly
Download the Code
Download the provided code and un-zip the file.
Guide For Pycharm
Please note that this assumes you already have Python installed on your system.
ONLY tested 3.10 Python so it might not work in newer and older versions
Install Required Packages
First, you need to install the necessary Python packages. Open the integrated command prompt in Pycharm:
Copy and paste the following into the terminal:
pip install opencv-python
pip install mediapipe
pip install ctypes
Run the Code
Go into pycharm and click on the three bars on top left. Click open… and select the un-zipped file. Run steering.py by doing F10 + Shift or on the top right of the screen
Exit the Application
To exit the application, press the ‘q’ key while the application window is active.
Make sure your system has a webcam or an external camera connected. The script uses the default camera (index 0). If you have multiple cameras or a different camera index, you may need to modify the code by changing the number from (0)
Feel free to ask if you have any questions or encounter any issues!
Common Errors
DO NOT be tabbed into the window with the camera output. Please click a different window to use it if you want to see the steering wheel. Else it shouldn’t matter.
If the tracker is not tracking your hands consider to close your hands while using. You can also lower the confidence bar on Line 65 and 66 (decimal = % for example 0.3 = %30 if you didn’t know)
Same goes for the tracker falsely identifying a hand. You may raise the confidence bar on 65 and 66 (decimal = % for example 0.3 = %30 if you didn’t know)
Steering Digitally 😀
Guide For Visual Studio Code
Please note that this assumes you already have Python installed on your system.
ONLY tested 3.10 Python so it might not work in newer and older versions
Install Required Packages
First, you need to install the necessary Python packages. To open the integrated command prompt in VScode go to the top and click on Terminal:
Copy and paste the following into the terminal:
pip install opencv-python
pip install mediapipe
pip install ctypes
Run the Code
Go into VScode and click on the File button on the top left. Click Open Folder and select the un-zipped file. After opening the file click on Steering.py. You should be able to run it from there
Exit the Application
To exit the application, press the ‘q’ key while the application window is active.
Make sure your system has a webcam or an external camera connected. The script uses the default camera (index 0). If you have multiple cameras or a different camera index, you may need to modify the code by changing the number from (0) (Line 61)
Feel free to ask if you have any questions or encounter any issues!
Common Errors
MAKE SURE you have your python interpreter to the one you installed your packages in.
DO NOT be tabbed into the window with the camera output. Please click a different window to use it if you want to see the steering wheel. Else it shouldn’t matter.
If the tracker is not tracking your hands consider to close your hands while using. You can also lower the confidence bar on Line 65 and 66 (decimal = % for example 0.3 = %30 if you didn’t know)
Same goes for the tracker falsely identifying a hand. You may raise the confidence bar on 65 and 66 (decimal = % for example 0.3 = %30 if you didn’t know)
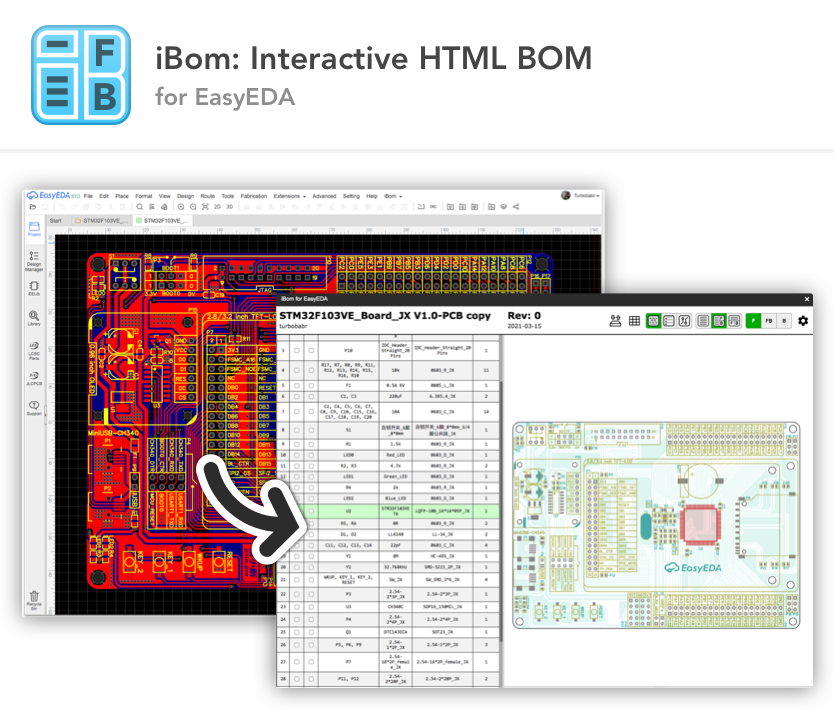


 https://github.com/turbobabr/easyeda-ibom-extension


![dependabot[bot]](http://litiv.top/wp-content/uploads/2025/08/29110)
![renovate[bot]](http://litiv.top/wp-content/uploads/2025/08/2740)
![dependabot-preview[bot]](http://litiv.top/wp-content/uploads/2025/08/2141)
![github-actions[bot]](http://litiv.top/wp-content/uploads/2025/08/15368)
![allcontributors[bot]](http://litiv.top/wp-content/uploads/2025/08/23186)


![mergify[bot]](http://litiv.top/wp-content/uploads/2025/08/10562)


![cursor[bot]](http://litiv.top/wp-content/uploads/2025/08/1210556)