
- Visual Studio 2017 version 15.7
- .NET Core
- Microsoft SQL Server (Not required on local machine if database is hosted on a server)
- Clone project.
- First of all make sure if you want to rename database name then update Database connection settings in
appSettings.json -> ConnectionStrings -> AcuCallContext. - You can create database, tables and stored procs using migration or script.
- If you want to run Db script then skip from step 5 to 8. Then navigate to Sql\DbScript.sql and execute it.
- Migration can be performed by opening Package Manager console and On top right selecting AcuCall.Infrastructure.Data from Default Project.
- Then run command
Update-Database, It will create database if it does not exist else perform migrations. - Once Migration is performed successfully, We need to enable Broker for Db notifications. So open your SQL Server instance.
- Connect to your server instance, and execute
ALTER DATABASE [DatabaseName] SET ENABLE_BROKER. - Executing migration or script will create a user admin with password admin.
- Now you are all ready to start application.
The very first step is to install .NET Core Runtime on your machine.
Enable the Web Server (IIS) server role and establish role services
- Use the Add Roles and Features wizard from the Manage menu or the link in Server Manager. On the Server Roles step, check the box for Web Server (IIS).
- After the Features step, the Role services step loads for Web Server (IIS). Select the IIS role services desired or accept the default role services provided.
- You can select different security levels from Web Server > Security if required.
- Proceed through the Confirmation step to install the web server role and services. A server/IIS restart isn’t required after installing the Web Server (IIS) role.
Enable the IIS Management Console and World Wide Web Services
- Navigate to Control Panel > Programs > Programs and Features > Turn Windows features on or off (left side of the screen).
- Open the Internet Information Services node. Open the Web Management Tools node.
- Check the box for IIS Management Console.
- Check the box for World Wide Web Services.
- Accept the default features for World Wide Web Services.
- You can select different security levels from World Wide Web Services > Security if required.
If the IIS installation requires a restart, restart the system.
-
On the hosting system, create a folder to contain the app’s published folders and files.
-
Within the new folder, create a logs folder to hold ASP.NET Core Module stdout logs when stdout logging is enabled. If logs folder already exist then we don’t need to create it. This folder will hold error logs happening in website.
-
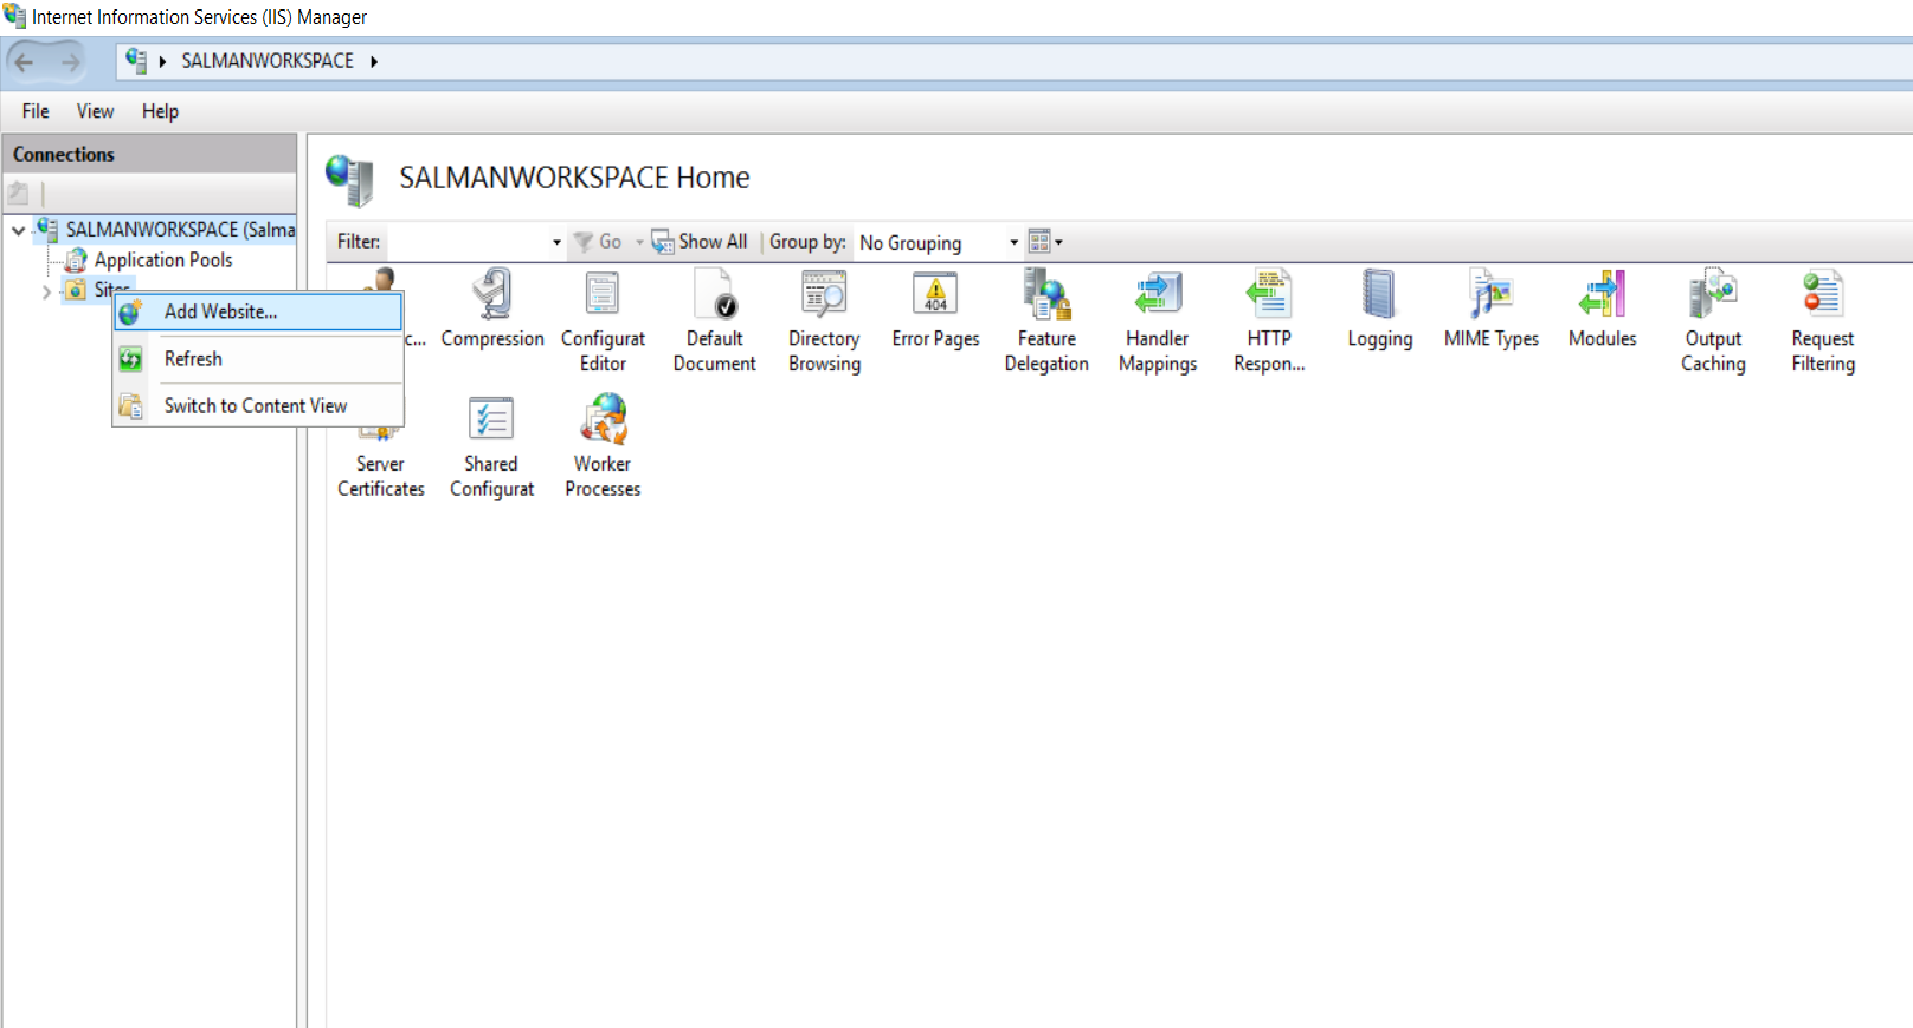
Open IIS Manager and then open the server’s node in the Connections panel. Right-click the Sites folder. Select Add Website from the contextual menu.

-
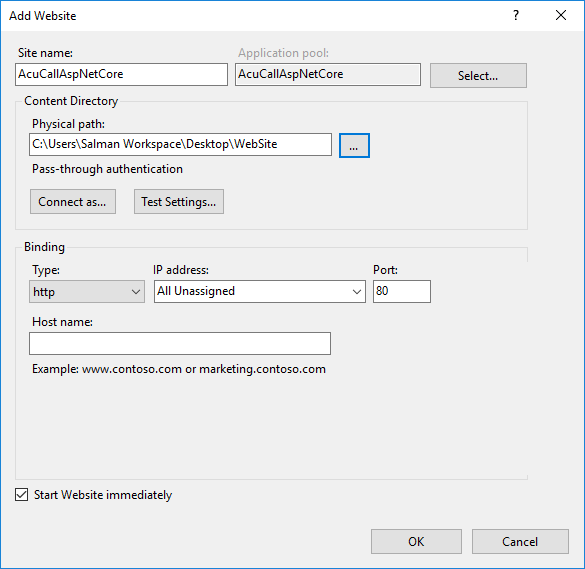
Provide a Site name and set the Physical path to the app’s deployment folder. Provide the Binding configuration by default port is 80 and create the website by selecting OK.

-
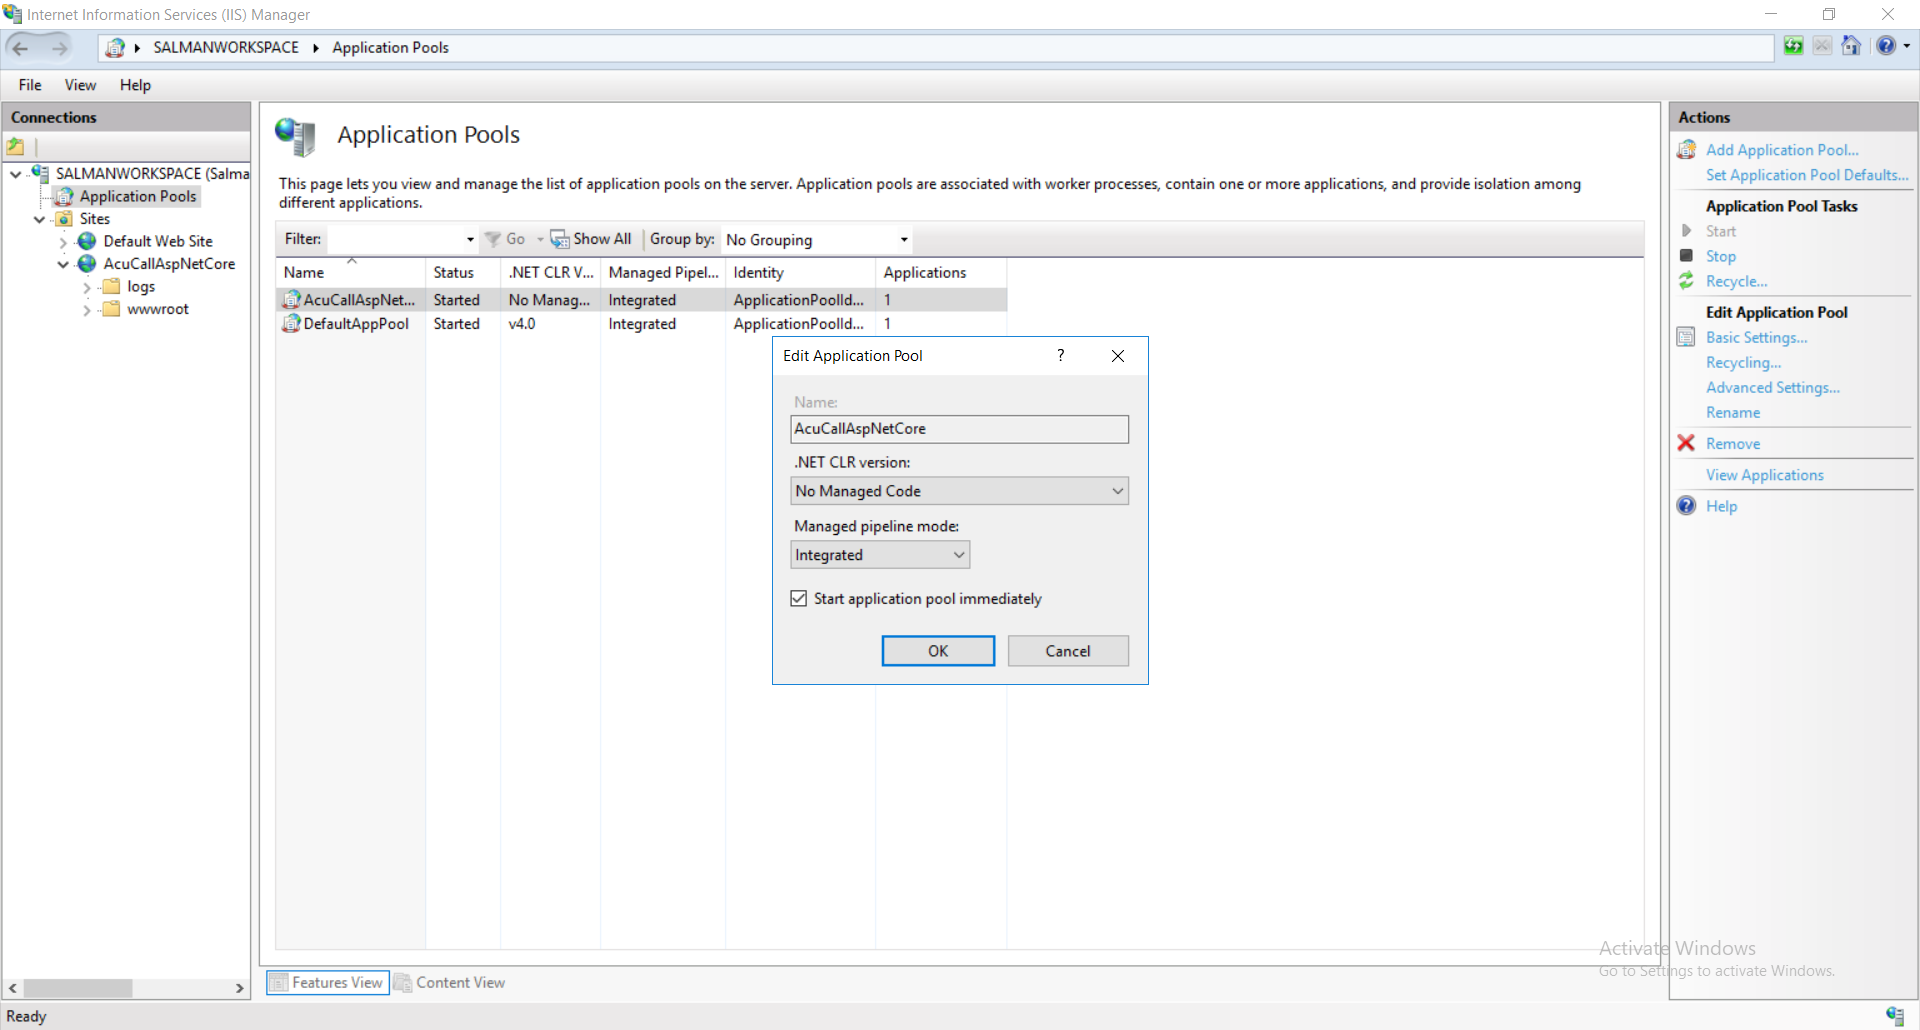
Under the server’s node, select Application Pools.
-
Right-click the site’s app pool and select Basic Settings from the contextual menu.
-
In the Edit Application Pool window, set the .NET CLR version to No Managed Code. As ASP.NET Core runs in a separate process and manages the runtime. ASP.NET Core doesn’t rely on loading the desktop CLR. Setting the .NET CLR version to No Managed Code is optional.

Deploy the app to the folder created on the hosting system by following below steps.
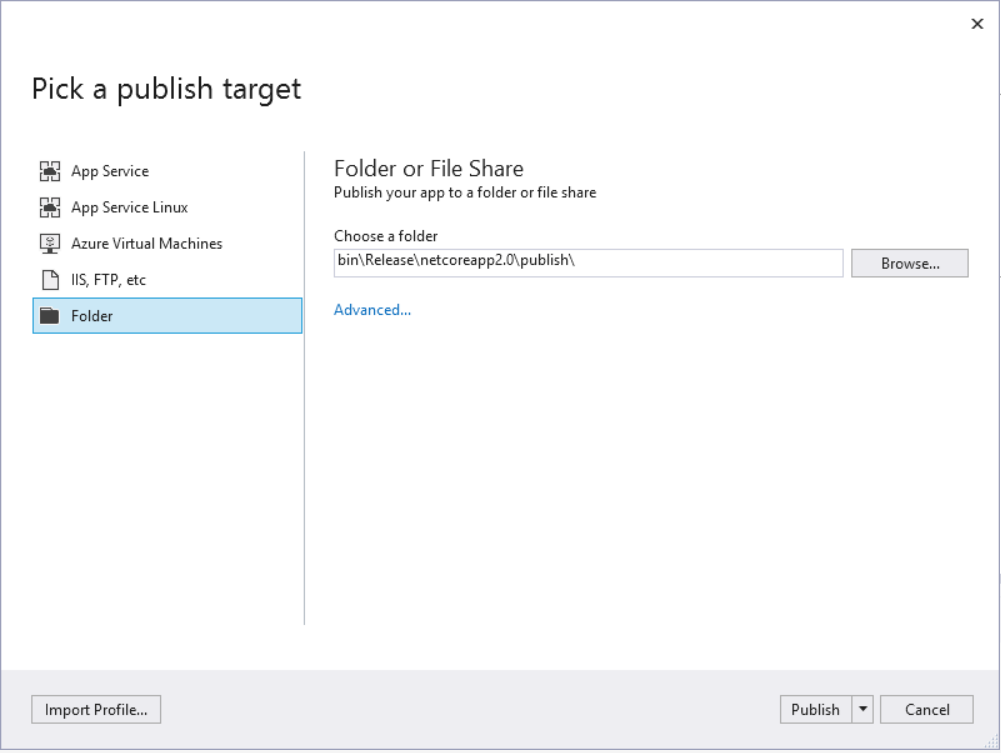
- Right-click the project AcuCall.Web and select Publish.
- When
Folderis selected, specify a folder path to store the published assets. The default folder isbin\Release\PublishOutputbut we need to set the path of Physical Path while creating new website in IIS Manager. Click the Publish button to finish.
NOW your application is served on localhost:[BindingPort]
For more further information regarding deployment you can visit Microsoft website.
-
Open IIS Manager Console, It can be found in Administrative Tools -> Internet Information Services (IIS) Manager.
-
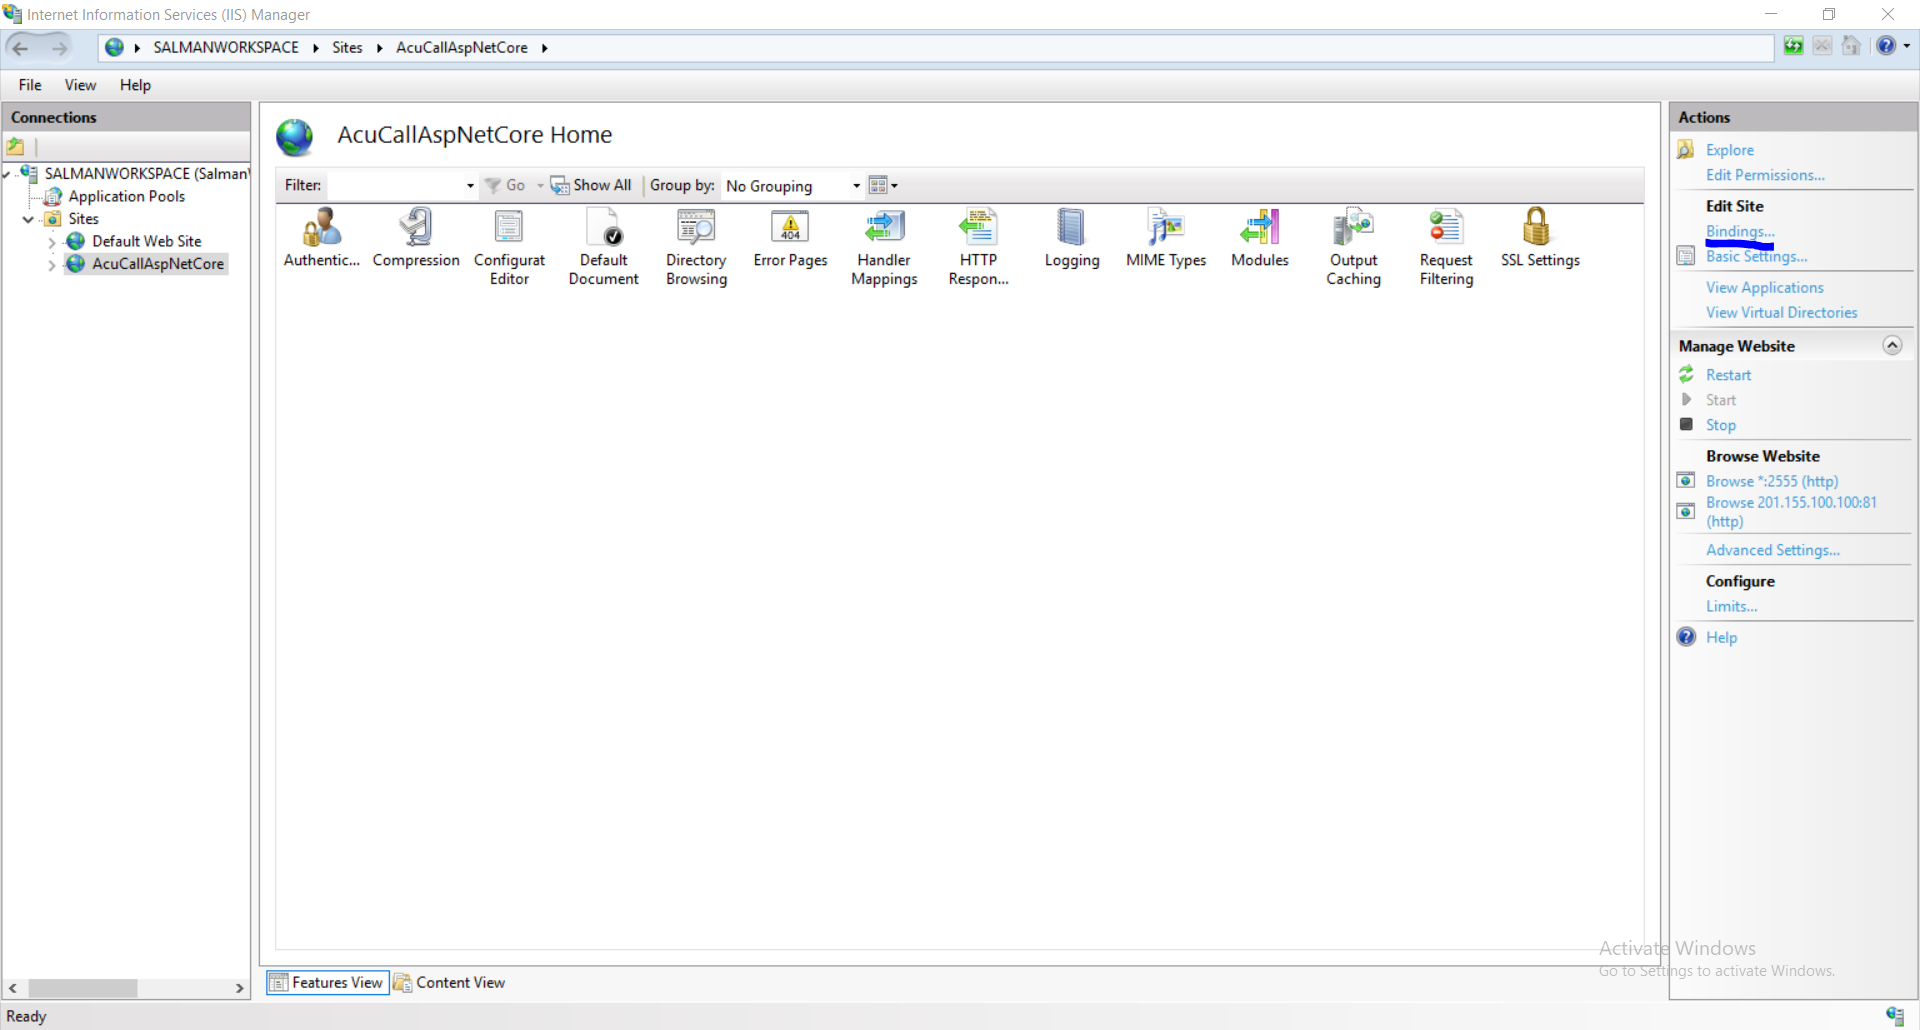
In the Connections pane of IIS, expand the Sites and select the website AcuCallAspNetCore this is what i have named previously in this doc or the one you have named.
-
Click on Bindings link and you will see current bindings of that website.

-
Click on Add button.
-
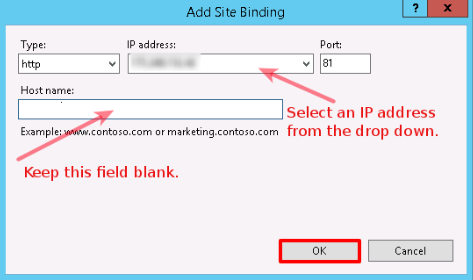
On the Add Site Binding window, keep website Type as http. Select an IP address from the drop-down menu upon which you want to bind the website. Since other websites (along with their Host Header Values) are already bound on port 80, you won’t be able to bind this new website on port 80 without Host Header Value (Host name). So, specify a port number (other than default port 80) on which you want to bind this new website. Keep Host name as blank, click OK and then Close. Once the binding is added in IIS Manager, the next step is allowing a port in Windows Firewall.

-
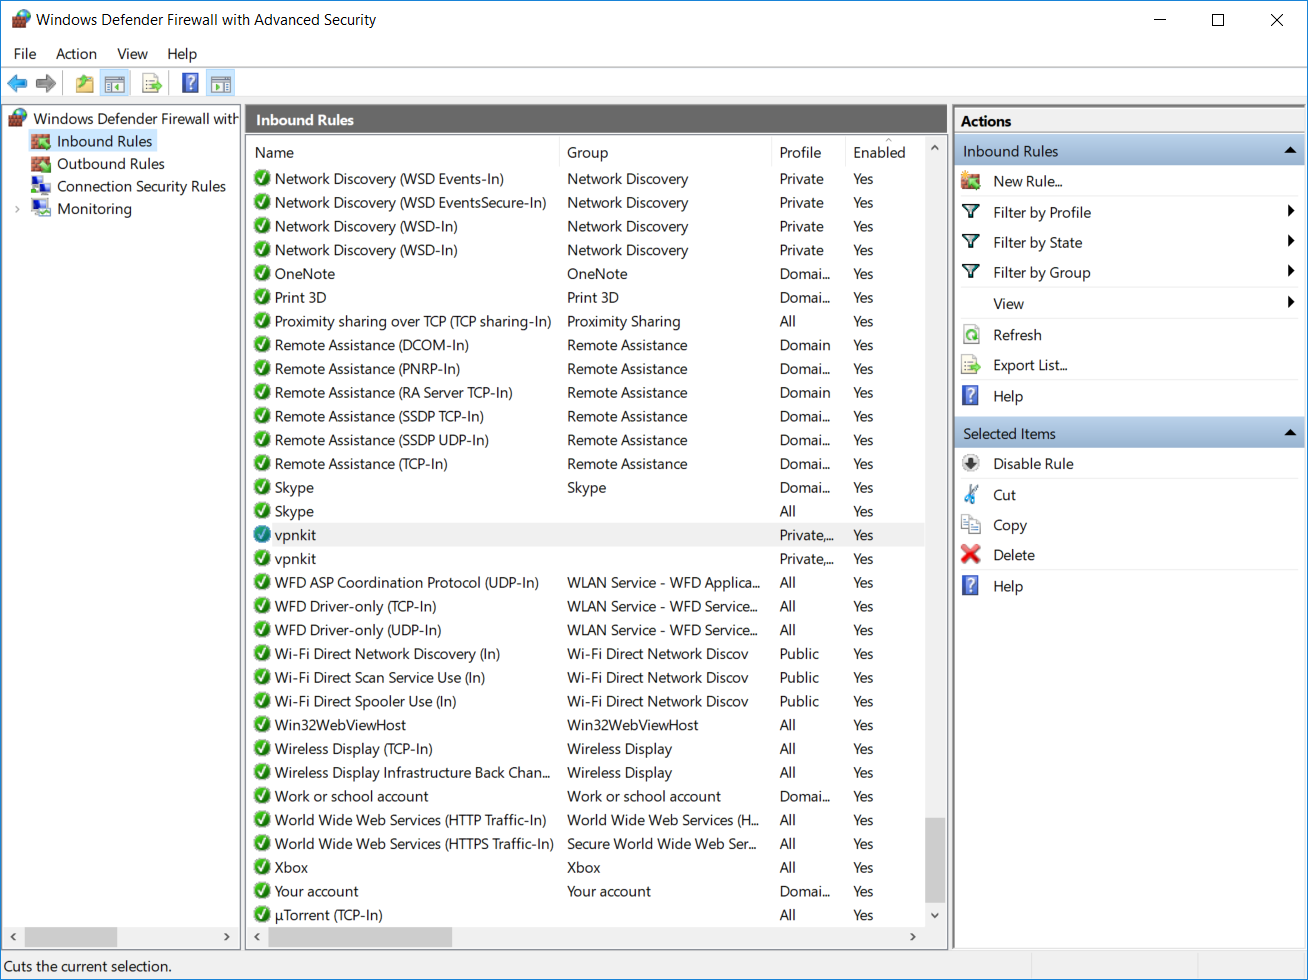
Go to Administrative Tools -> Windows Defender Firewall with Advanced Security.
-
At Windows Firewall window, click on Inbound Rules.

-
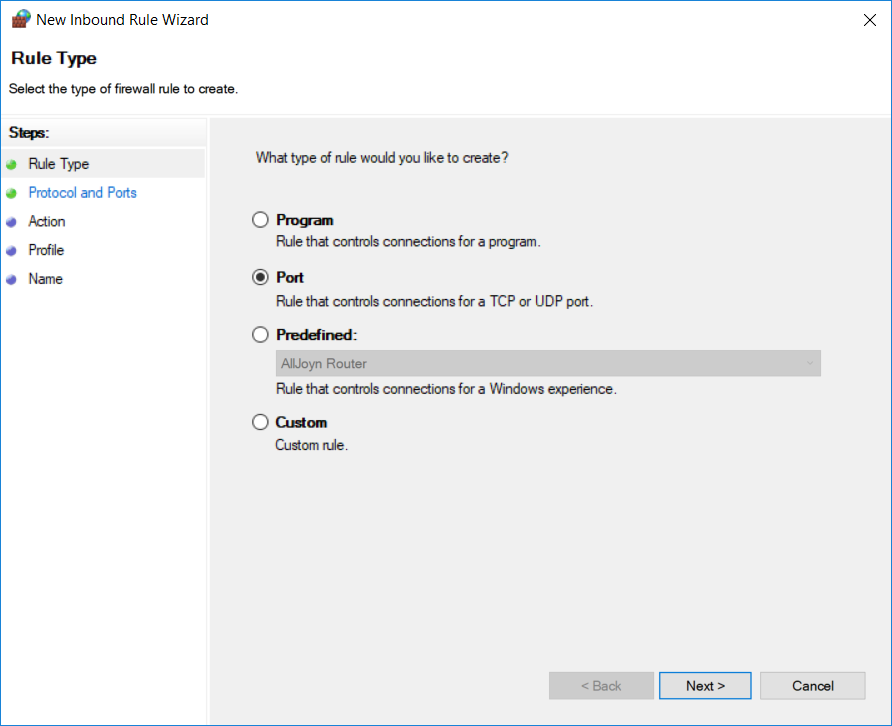
Under Actions pane, click on New Rule and New Inbound Rule Wizard will be opened. On this window, select the Port radio button and click on Next.

-
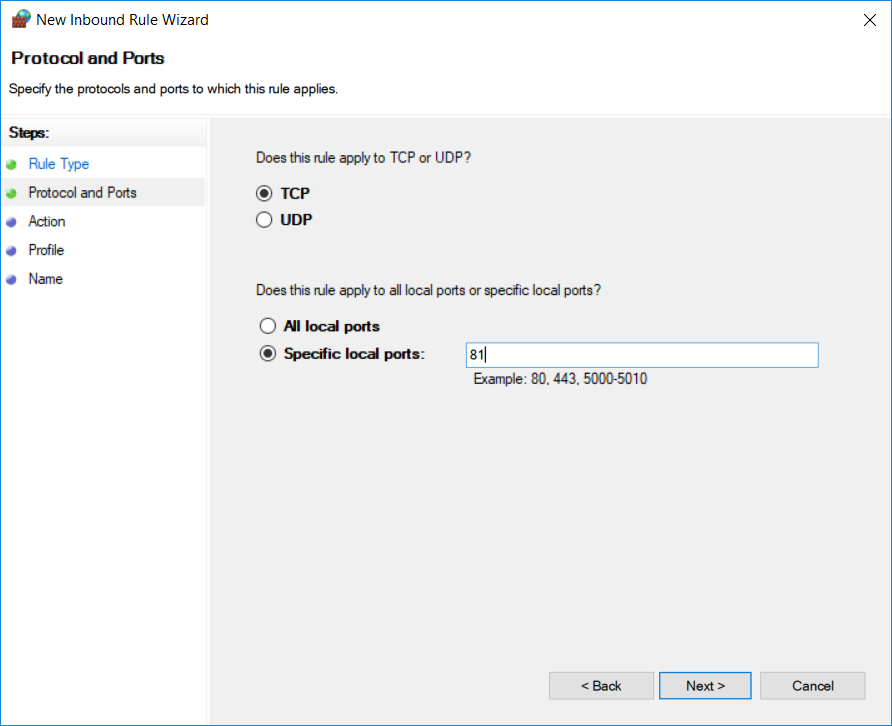
On the next screen, select TCP and Specific local ports radio button. Specify a port number (upon which you set binding in IIS) in Specific local ports field and click Next.

-
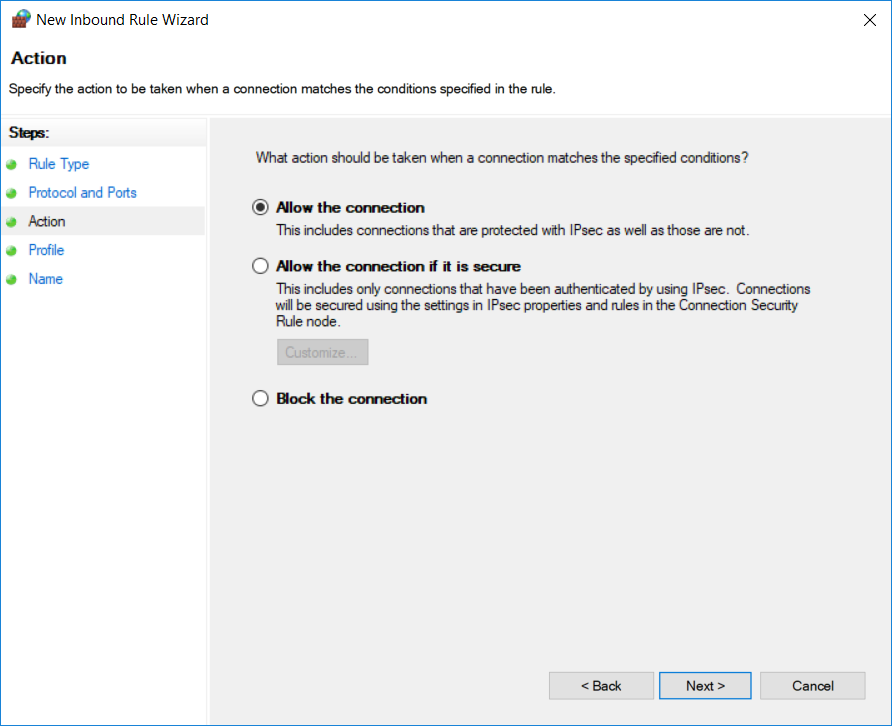
On the next screen, select Allow the connection and click Next.

-
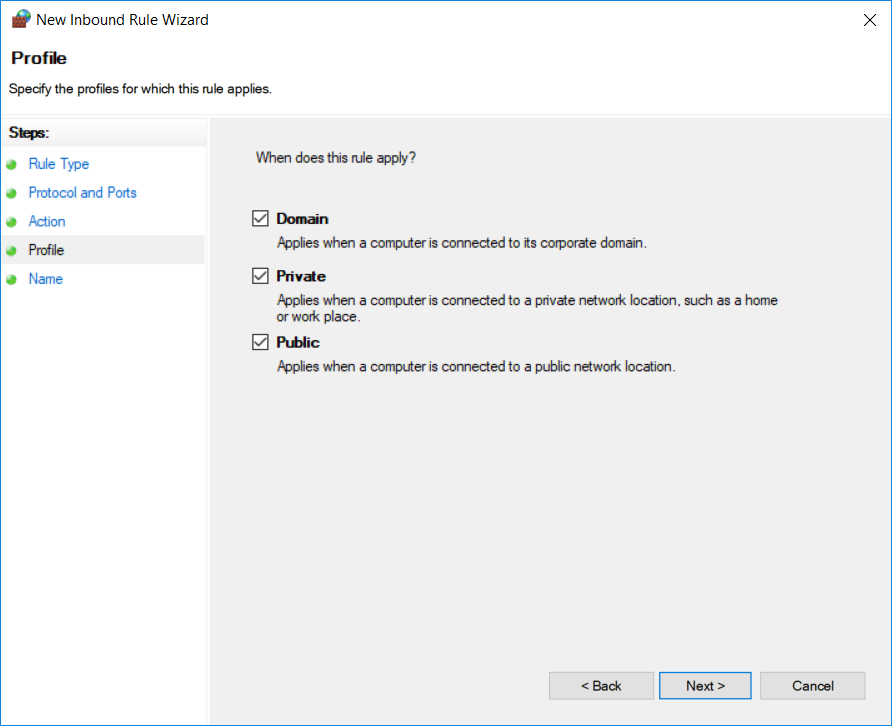
Select the profiles for those we want to apply this rule and click Next.

-
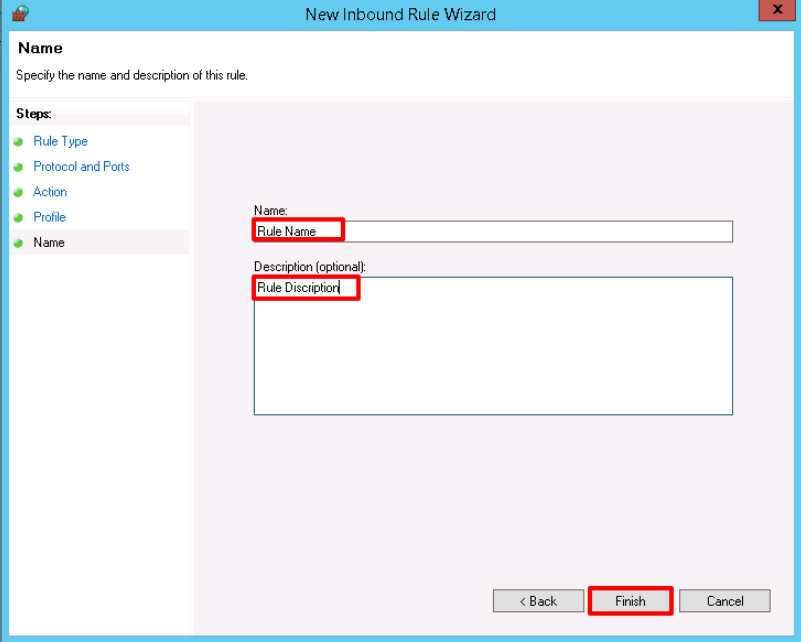
Very last step is to provide Name and Description for the newly created rule & click Finish.

Now we are able to access your website using via IP address like http://VPS-IP-Address:81
 https://github.com/SalmanZahid/AcuCallTest
Leave a Reply